Showing posts with label HTML. Show all posts

Saturday, January 14, 2012

Falling Objects / Falling Text / Marquee Scrolling Text Generator for Blogger

You can show the falling objects or graphics to your Blogger profile page. This generator falling objects to specify an image of your choice. Once you paste the HTML code to your Blogger profile page, you see several copies of the image of all that fall on the page!


For this to work, make sure you specify the exact location of an image. Also note that some browsers can not display the objects that fall as planned.The widget is originally developed by allblogtools.com, i just changed something in the widget.


Blogger Falling Text Code Generate


Here's a cool way to get that "falling text" effect on your Blogger profile page. Elsewhere, you can use JavaScript for the effect of the fall of text - but not on Blogger. Fortunately, you can use a little HTML trick to get the same effect!

Use the form below to generate text fall into your Blogger profile page. You can then copy and paste the HTML code on your profile page.The widget is originally developed by code-generator.net, i just changed something in the widget.


Blogger Falling Object Generator Code


You can show the falling objects or graphics to your Blogger profile page. This generator falling objects to specify an image of your choice. Once you paste the HTML code to your Blogger profile page, you see several copies of the image of all that fall on the page!

For this to work, make sure you specify the exact location of an image. Also note that some browsers can not display the objects that fall as planned.The widget is originally developed by code-generator.net, i just changed something in the widget.


Marquee Scrolling Text Generator for Blogger


In HTML, allows you to have a marquee scrolling text and images. Tents are perfect for your Blogger page, allowing you to do things that normally require JavaScript (which does not allow Blogger).

You can create a Blogger marquee to scroll horizontally or vertically. You can also change other things as the speed at which it moves.

Use the form below to generate the code for Blogger marquee. Simply select the values ​​you need, click "Generate Marquee and Preview", then copy and paste in your profile page.The widget is originally developed by code-generator.net, i just changed something in the widget.


How to Install Blogger Code Generator Widget


I have to write two set of instructions for each steps, as some of you are using the default layout, and some of you are using the new layout. So, let's see how to install this cool widget in your blog..


Step 1:

If you're using the old Blogger interface: Go to Dashboard - Design - Page Elements - Add a Gadget.

Add a Gadget of HTML/JavaScript type.
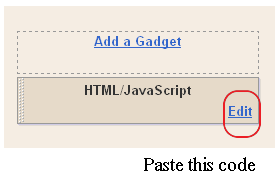
If you're using the new Blogger interface: Go to Dashboard - Layout - Add a Gadget
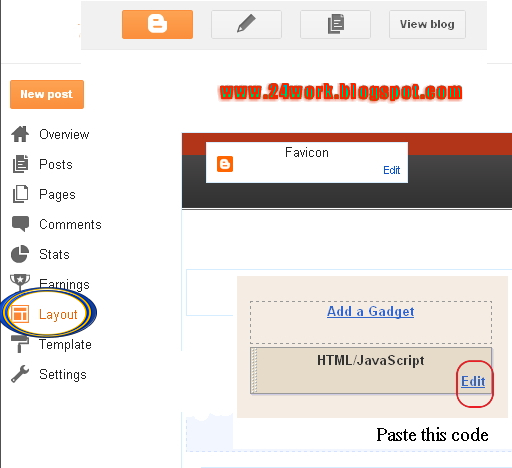
2.Click on 'Add a Gadget' on the sidebar.

3.Select 'HTML/Javascript' and add the one of code given below

4. Now Click On Save 'JavaScript' You are done.


Tuesday, January 10, 2012

Recent Comments Widget For Blogger / Blogspot with Top Commenters

This post explains how you can add Recent Comments widget for Blogger Blogspot blogs.Once the reader finds a recent comments widget in the sidebar of the blog, will come to know that your blog is quite active and invites you to send comments on his blog. In this way you can collect some active user base to comment on your blog posts.Now you can reward your best commentators, showing their names with clickable links to your Blogger blog and it helps to see that comments in his blog more often.


How to Install WordPress styled Recent Comments Widget For Blogger

I have to write two set of instructions for each steps, as some of you are using the default layout, and some of you are using the new layout. So, let's see how to install this cool widget in your blog..


Step 1:


If you're using the old Blogger interface: Go to Dashboard - Design - Page Elements - Add a Gadget.


Add a Gadget of HTML/JavaScript type.

If you're using the new Blogger interface: Go to Dashboard - Layout - Add a Gadget


2.Click on 'Add a Gadget' on the sidebar.

3.Select 'HTML/Javascript' and add the one of code given below

4. Now Click On Save 'JavaScript' You are done.


Blogger WidgetsBlogger Widget


And now click Save


How to Install Recent Comments Widget For Blogger


So, let's see how to install this cool widget in your blog..

1. Sign into Blogger dashboard

old Blogger interface: Go to Dashboard - Design - Page Elements - Add a Gadget.If you're using the new Blogger interface: Go to Dashboard - Layout - Add a Gadget.Select 'HTML/Javascript' and add the one of code given below.Just copy and paste this code..


Blogger Widgets


And now click Save


Display only the comment author and the comment


So, let's see how to install this cool widget in your blog..

1. Sign into Blogger dashboard

old Blogger interface: Go to Dashboard - Design - Page Elements - Add a Gadget.If you're using the new Blogger interface: Go to Dashboard - Layout - Add a Gadget.Select 'HTML/Javascript' and add the one of code given below.Just copy and paste this code..


Blogger Widgets


And now click Save


How To Add Recent comments widget Generator :


1. Customize Bellow form and Click on Generator button.

2. And Click Add to Blogger button to add this widget to your blog.


Precaution: Do NOT add a slash ‘/’ after the URL. It should be BlogName.blogspot.com and not BlogName.blogspot.com/ . Also http:// part has NOT to be added before the URL.


Many thanks to bloggerplugins for making this code and I just tested and modified to work on blogger


OPTIONAL SETTINGS

How to change the number of comments

This widget is set to display 5 recent comments. If you want to change that number, just look for the number 5 in the code and replace it with the number of comments you want to be displayed. I recommend setting it to 5 to 8 comments.


var a_rc=5


How to change the number of characters / hide excerpts

This widget is set to display a maximum of 100 characters of comment excerpt for each comment. If you want to change that number, just look for the number 100 in the code and replace it with the number of characters you want to be displayed. *

var o_rc=100

*Recommended setting: 50 to 100.
If you want to hide the comment excerpts, just enter 0 (zero). Ex. …var o_rc=0


How to display the date of comments

If you want to show the dates of comments, look for this line:

var m_rc=false

and replace the false with true.

Change YOUR BLOG URL with your blog url. Don't include www.

Replace http://bdlab.blogspot.com ( given in RED bold letters) with your blogspot URL or your website URL. Do not try to change anything from the code


How To Add Top Commenters Widget in Blogger

No need to explain about the comments feed. Each comment not only helps the commentator, but also the owner of the blog. Discuss and comment back is a powerful tool in SEO.Being owner of a blog, it is our duty to find it "comment" more and then give a great respect for them. Here the code for creating a "widget TOP COMMENTATOR" from the last 10,000 comments.You may have noticed the widget Commentators Save on WordPress blogs. Sometimes referred to as Best Commentators Widget. Now you can reward your best commentators, showing their names with clickable links to your Blogger blog and it helps to see that comments in his blog more often.


Now you can show your blog Top commentators, or you may call the King of commentator. With this widget, you can encourage your visitors to leave comments. Is not that good? It's nice.

So, let's see how to install this Top Commentators Widget for Blogger / Blogspot with Advanced Features..

1. Sign into Blogger dashboard

old Blogger interface: Go to Dashboard - Design - Page Elements - Add a Gadget.If you're using the new Blogger interface: Go to Dashboard - Layout - Add a Gadget.Select 'HTML/Javascript' and add the one of code given below.Just copy and paste this code..

Blogger Widgets


And now click Save


You need to change :

YOURBLOGNAME with your blog name without http://
YOUR NAME with your name which will be excluded in that widget.
number=5 Change the value of Commenter will be shown. [Optional]

4. Save and DONE!


Also, the commenter above get dofollow backlinks. This widget is really useful and encourage visitors to send the maximum of the King comments in your blog commentator.


How To Add Top comments widget Generator :


1. Customize Bellow form and Click on Customize button.

2. And Click Add to Blog >> button to add this widget to your blog.


1.Enter the name of your Blog without the "http://" part. The URL would be like yourblog.blogspot.com for the blogspot users and www.yourdomain.com for the custom domain users. So Enter the URL in the Blog URL field.
2.Key in the name that you wish to exclude from the commenters list, This is your name and type it in Filter Your Name field.
3.Lastly type in how many top commenters you would like to feature in the Widget. This is by default set to 5

Precaution: Do NOT add a slash ‘/’ after the URL. It should be BlogName.blogspot.com and not BlogName.blogspot.com/ . Also http:// part has NOT to be added before the URL.


Many thanks to corpseofattic for making this code and I just tested and modified to work on blogger


Top Commentators Cloud Widget for Blogger / Blogspot

Reward your best commentators, showing their names with clickable links to your blog. One of the most popular methods is the use of a top commentators widget.This time we will create a new top commentators widget, but with a different look. Let's make a cloud, like a tag cloud, except with the commentators and the content.I personally prefer this version of clouds over the top commentators widget conventional, simply because most commentators packets of the same amount of space.The widget is originally developed by bloggersentral.com, i just changed something in the widget.


So, let's see how to install this cool widget in your blog..

1. Sign into Blogger dashboard

old Blogger interface: Go to Dashboard - Design - Page Elements - Add a Gadget.If you're using the new Blogger interface: Go to Dashboard - Layout - Add a Gadget.Select 'HTML/Javascript' and add the one of code given below.Just copy and paste this code..


Blogger Widgets


Get this commentators widget


And now click Save


Customizing Commentators Cloud

YourBlogUrl
This is your blog URL, replace http://bdlab.blogspot.com with yours. Make sure you omit the slash at the end of the URL (as in .com/).
Exclusions
List the commentator names you want to exclude from the cloud. Separate each name with a comma, and don’t put space between them.
Show How Many
Specify how many top commentators you want to appear in the cloud.
Order
Enter alphabet if you want to arrange the names alphabetically.
Enter frequency if you want to arrange them by frequency (with the most frequent commentators on top).
Comment count
Comment count (in bracket) is displayed by default. To remove it, just delete this line of code.


Thursday, January 5, 2012

How to change mouse cursor in blogger blog to animated cursors

How to change mouse cursor in blogger blog to animated cursors.One of the best way to add extra fun to your blog is, changing mouse cursor on your blog. Changing the mouse cursor in blogger or blogspot blogs is very easy.This tutorial will help you to change the mouse cursor of your blog to animated cursors.Many bloggers are asking such kind of questions but there is no tutorial available on the internet.I created this post because there are a blogger friend who asked how to change the pointer / cursor on the blogger. This you can do to decorate the look of blog.


I take the cursor image from http://www.totallyfreecursors.com/ and http://cursors.funutilities.com/ you can change it anytime depends on your festive moods.


How to Install mouse cursor in blogger blog to animated cursors


I have to write two set of instructions for each steps, as some of you are using the default layout, and some of you are using the new layout.Backup your template before attempting this tutorial.

Step 1:

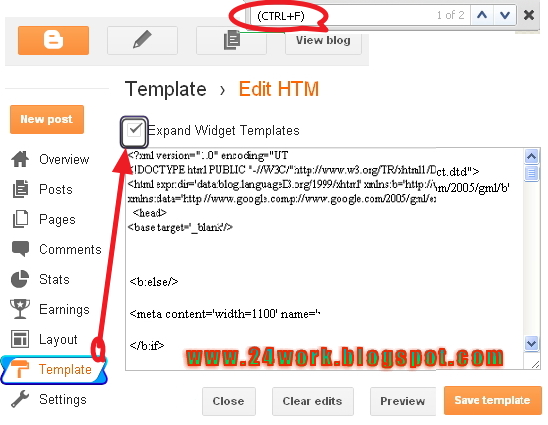
In old layout: Go to Dashboard - Design - Edit HTML - Expand Widget Templates.


In new layout: Go to Dashboard - Template - Edit Template HTML - Expand Widget Templates.


Now find (CTRL+F) this code in the template:


And immediately before it, paste this code:


Blogger Widgets


And now click Save Template


The above step will give you a mouse cursor just like the one in the above demo blog, And because the aim of this tutorial is to give you all control over your blog cursor, So you can just change the red part in the above code

http://safir85.ucoz.com/bdlab-blogspot/apple-tmani.gif

To What ever cursor url you like, So the code should be

body, a, a:hover {cursor: url(Cursor-Url), progress;}


You can change the cursor image just change the above Red code

Some cursors are give bellow


Blogger Widgets


Blogger Widgets


Blogger Widgets

Blogger Widgets


Blogger Widgets


Blogger Widgets


Blogger Widgets


Blogger Widgets


Blogger Widgets


Blogger Widgets


Blogger Widgets


Blogger Widgets


Blogger Widgets


Blogger Widgets


Blogger Widgets


Blogger Widgets


Blogger Widgets


Blogger Widgets


Blogger Widgets


Blogger Widgets


Blogger Widgets


Blogger Widgets


Blogger Widgets


Blogger Widgets


Blogger Widgets


Blogger Widgets


Blogger Widgets


Blogger Widgets


Blogger Widgets


Blogger Widgets


Blogger Widgets

Blogger Widgets

Blogger Widgets


Blogger Widgets


Blogger Widgets


Blogger Widgets


Blogger Widgets


Blogger Widgets


Blogger Widgets


Blogger Widgets


Blogger Widgets


Blogger Widgets


Blogger Widgets


Blogger Widgets


Blogger Widgets

Blogger Widgets


Blogger Widgets


Blogger Widgets


Blogger Widgets


Blogger Widgets


Blogger Widgets


Blogger Widgets


Blogger Widgets


Blogger Widgets


Blogger Widgets


Blogger Widgets


Blogger Widgets


Blogger Widgets


Blogger Widgets

Blogger Widgets


Blogger Widgets

Blogger Widgets


Blogger Widgets


Blogger Widgets


Blogger Widgets


Blogger Widgets


Blogger Widgets


Blogger Widgets


Blogger Widgets


Blogger Widgets


Blogger Widgets


Blogger Widgets

Blogger Widgets

Blogger Widgets


Blogger Widgets


Blogger Widgets


Blogger Widgets


Blogger Widgets


Blogger Widgets


Blogger Widgets


Blogger Widgets


Blogger Widgets


Blogger Widgets


Blogger Widgets


Blogger Widgets


Blogger Widgets


Blogger Widgets

Blogger Widgets


Blogger Widgets


Blogger Widgets


Blogger Widgets


Blogger Widgets


Blogger Widgets


Blogger Widgets


Blogger Widgets


Blogger Widgets


Blogger Widgets


Blogger Widgets


Blogger Widgets


Blogger Widgets


Blogger Widgets


Note We are going to add more animated and cursors oftenly so keep visiting this page.


Blogger MySpace Cursor Code Generate


You can change the appearance of the cursor on the MySpace profile page (the cursor is the little that moves on the screen by moving the mouse). For example, you could make the appearance of the cursor as a question mark when the user hovers over an object.The widget is originally developed by code-generator.net, i just changed something in the widget.


How to Install Blogger MySpace Cursor Code Generator Widget


I have to write two set of instructions for each steps, as some of you are using the default layout, and some of you are using the new layout. So, let's see how to install this cool widget in your blog..


Step 1:

If you're using the old Blogger interface: Go to Dashboard - Design - Page Elements - Add a Gadget.

Add a Gadget of HTML/JavaScript type.

If you're using the new Blogger interface: Go to Dashboard - Layout - Add a Gadget

2.Click on 'Add a Gadget' on the sidebar.

3.Select 'HTML/Javascript' and add the one of code given below

4. Now Click On Save 'JavaScript' You are done.