Showing posts with label Blogger Tricks. Show all posts

Friday, March 16, 2012

Replace Older, Newer And Home Naviagtion Links With Button Images

In this tutorial I'll show you that how to replace older, newer and home Navigation links with button images. These Navigation links are located at the bottom of posts section.

Just Follow these simple steps:
Note: Backup Your Template before making any changing in Template.

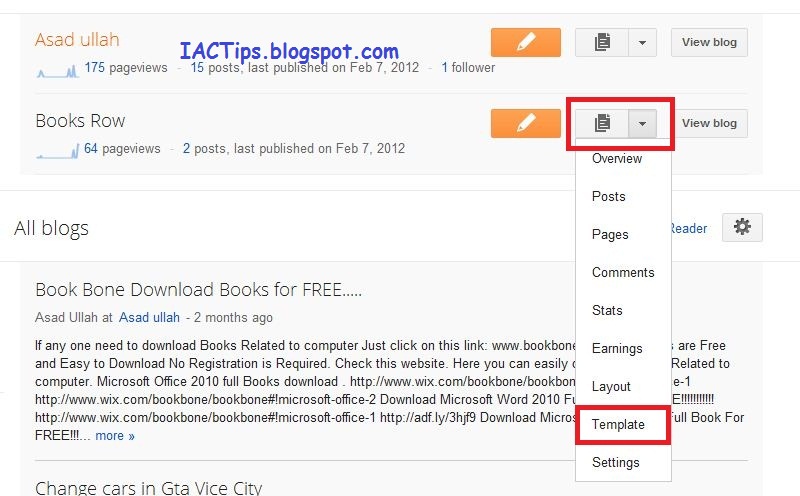
Step 1.  Login to your blogger account. click on drop-down menu and then click on template.


Step 2.   Now click on Edit Html and then click on Expand Template Widgets checkbox.


Step 3.   Search for ( press CTRL+F for a search bar ). Replace with below code.


Step 4.  Search for and replace it with below code.


Step 5.   Now last time search for   and replace with below code.


Click on Save Template.

You can change your own icons by replacing the image url in the above three codes.

Drop Your Comments.....

Replace Older, Newer And Home Naviagtion Links With Button Images

In this tutorial I'll show you that how to replace older, newer and home Navigation links with button images. These Navigation links are located at the bottom of posts section.

Just Follow these simple steps:
Note: Backup Your Template before making any changing in Template.

Step 1.  Login to your blogger account. click on drop-down menu and then click on template.


Step 2.   Now click on Edit Html and then click on Expand Template Widgets checkbox.


Step 3.   Search for ( press CTRL+F for a search bar ). Replace with below code.


Step 4.  Search for and replace it with below code.


Step 5.   Now last time search for   and replace with below code.


Click on Save Template.

You can change your own icons by replacing the image url in the above three codes.

Drop Your Comments.....

Wednesday, March 14, 2012

Changing Blogger Font Size ( J-Query Widget )

Changing Blogger Posts font size is a cool widget. This widget will allows your reader to change the font size of your blogger posts as they want, bigger or smaller. This widget will change blogger post font size very fast. With the help of this widget your reader do not need to refresh page or do any thing else, they just drag a point to right or left and they get bigger or smaller text. So let's see how to add this widget to your blogger.

Note: Before you apply any changing to your blogger template, Download Full Template of your blog.


Now just follow these simple steps to add Widget.

Step 1.    Log in to your blogger account, click on drop down menu and then click on template.


Step 2. Click on Edit HTML


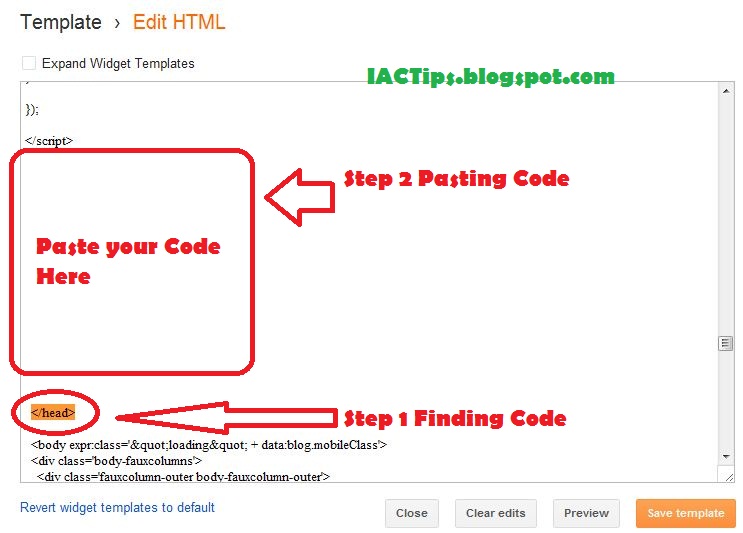
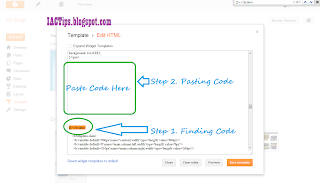
Step 3.  Find the following code


and before / above this code add the following code.


Step 4.   At the same page try to find the following code or a similar one


And you'll have to add simple code before and after it, then it will look like following.


after adding these codes click on Save Template.

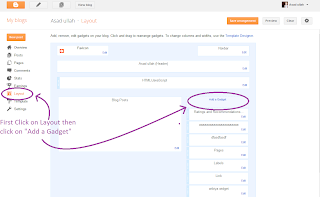
Step 5.   Now click on Layout tab, click on Add A Gadget and choose Html / Javascript .


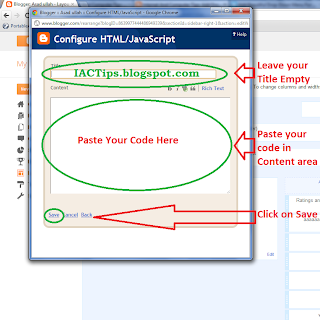
And in the content area, paste the following code.


And Click On "Save".
Now your widget is ready for your blog.


Drop Your Comments........
This Script is originally made by CiudadBlogger.com

Changing Blogger Font Size ( J-Query Widget )

Changing Blogger Posts font size is a cool widget. This widget will allows your reader to change the font size of your blogger posts as they want, bigger or smaller. This widget will change blogger post font size very fast. With the help of this widget your reader do not need to refresh page or do any thing else, they just drag a point to right or left and they get bigger or smaller text. So let's see how to add this widget to your blogger.

Note: Before you apply any changing to your blogger template, Download Full Template of your blog.


Now just follow these simple steps to add Widget.

Step 1.    Log in to your blogger account, click on drop down menu and then click on template.


Step 2. Click on Edit HTML


Step 3.  Find the following code


and before / above this code add the following code.


Step 4.   At the same page try to find the following code or a similar one


And you'll have to add simple code before and after it, then it will look like following.


after adding these codes click on Save Template.

Step 5.   Now click on Layout tab, click on Add A Gadget and choose Html / Javascript .


And in the content area, paste the following code.


And Click On "Save".
Now your widget is ready for your blog.


Drop Your Comments........
This Script is originally made by CiudadBlogger.com

Monday, March 12, 2012

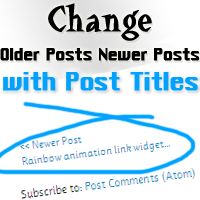
Change Older and Newer posts with Post Titles for Blogger

change older posts newer posts with titles
Change posts Navigation Links Newer posts and older posts by the Corresponding Post Titles.This Awesome Blogger Hack lets your blog visitors to Know Newer and Older posts and they can go to that Posts.I got this hack from Spiceupyourblog.com .This trick done using some jquery script.


Add Jquery script

  • Copy and paste the below code before

Add CSS code

.blog-pager-newer-link {background-color:transparent !important;padding: 0 !important;}
.blog-pager-older-link {background-color:transparent !important;padding: 0 !important;}
#blog-pager-newer-link {padding:5px;font-size:90%;width:200px;text-align:left;}
#blog-pager-older-link {padding:5px;font-size:90%;width:200px;text-align:right;}
#blog-pager{height:100% !important;}

Friday, March 9, 2012

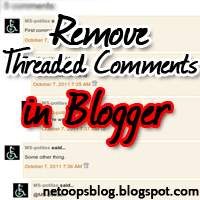
Remove Threaded Comments in Blogger Easily

remove threaded comments blogger
This is a simple article explaining How to remove Blogger 's New Threaded commenting system easily.There are some problems with it,Many users report that when a user click on post link,it takes control to the bottom of the page(to the comment section).Would you think that Threaded commenting system is not Good for Blog? Then you can remove it.
I am not going to say too much about Threaded commenting System,because i hope you know about it.
Follow the instructions below carefully.


Before Editing Template,you must Backup your template(How to Backup Template?)

  • Go to Design-> Edit HTML
  • Tick on Check box  Expanded Widget Templates
  • Find the code data:post.showThreadedComments easily using ctrl+F
  • You will found code snippet like this


  • Replace it carefully with the following code [Note: You will find the above code twice,replace it twice]


  • Save it ,
No longer Threaded commenting appear on your blog.Normal commenting will back.
Cheers..!

Monday, March 5, 2012

Add Page Peel effect with jQuery & CSS to Blogger

page peel for blogger
You may saw this awesome trick used by many professional and other Websites/Blogs.This Page peel is used to Show ads ,this page peel attract Blog visitors and they may have the tendency to click on ad and your earnings increases.Also this page peel can be used to increase your Subscribers.Here I am going to show you how to add a page peel trick to Blogger blog.


Click the link below to view demo

Step 1: Add jQuery plugin (if your blog have a jquery plugin,ignore this step)
  • Copy the below code inside
Step 3:

netoops blog

Change can the RED highlighted text with url image url that you want,else leave it default(needn't change)
Change the BLUE highlighted text with your feed URL or place your advertisement
  •  Save the Template
You are done..! If any problem persists please do comment.

Sunday, March 4, 2012

Add Drop-Down Menu For Blogger

This Menu is compatible with most of modern and classic browsers, and can be added for any template in only 3 steps,

Note: Don't forget to Backup your current blogger template ( If you don't know how to download blogger template Click Here to see article ).

Follow These simple Steps:

Step 1.   Log in to your blogger account, click on Drop-Down menu and then click on Template.


Step 2.   Click on Edit HTML and Find the following code ( Press CTRL+F for a search bar ).

]]>

And before / above this code add the following CSS code,


Step 3.   Now Find the following code (  Press CTRL+F for a search bar ).


Before / above this code add following code


Step 4.   Now Click on "Save Template".

Step 5.   Now go to your blogger Dashboard click on layout tab, click on Add A Gadget.


Any where on the screen, and choose "HTML / JavaScript".


Leave the title empty and at the content area, Paste the following code.


Step 6.   And click on "Save".


Now , it's a important to move the new gadget from the current place to the top of your page, if it was on the sidebar, or any other place , just drag it to header and click on "Save"  again.

In last code you must change the menu titles and replace all # letters by right menu url.

Drop  Your Comments......

Add Drop-Down Menu For Blogger

This Menu is compatible with most of modern and classic browsers, and can be added for any template in only 3 steps,

Note: Don't forget to Backup your current blogger template ( If you don't know how to download blogger template Click Here to see article ).

Follow These simple Steps:

Step 1.   Log in to your blogger account, click on Drop-Down menu and then click on Template.


Step 2.   Click on Edit HTML and Find the following code ( Press CTRL+F for a search bar ).

]]>

And before / above this code add the following CSS code,


Step 3.   Now Find the following code (  Press CTRL+F for a search bar ).


Before / above this code add following code


Step 4.   Now Click on "Save Template".

Step 5.   Now go to your blogger Dashboard click on layout tab, click on Add A Gadget.


Any where on the screen, and choose "HTML / JavaScript".


Leave the title empty and at the content area, Paste the following code.


Step 6.   And click on "Save".


Now , it's a important to move the new gadget from the current place to the top of your page, if it was on the sidebar, or any other place , just drag it to header and click on "Save"  again.

In last code you must change the menu titles and replace all # letters by right menu url.

Drop  Your Comments......