You should already know about JQuery Featured Content Slider.Today we will see how to add 17+ jQuery featured content sliders / slideshows for your blog or website.Almost all bloggers use the contents, which included slider.Contents are a great way to show a lot of content in a smaller area of a web page or a blog. Automatic sliding doors are dynamic content in many popular websites on the web.This is a great technique to represent different types of content in a limited space and a good way to involve the user.You have probably noticed that a lot of websites recently a working area with content that slides or changes in any way.
Are you interested in implementing a content slider in your website? Checkout this list!Here I am going to teach you, how to add a featured content slider to your blogger / blogspot blogs.You're not sure what is it exactly? You`ll see below ;)
Featured Content Slider for Blogger Using jQuery

Are you interested in implementing a content slider in your website? Checkout this list!Here I am going to teach you, how to add a featured content slider to your blogger / blogspot blogs.You're not sure what is it exactly? You`ll see below ;)
Featured Content Slider for Blogger Using jQuery
How to Install This Widget on Blogger?
Steps...
A. Adding CSS Theme Code
B. Adding Script Code
C. Adding HTML Code
Adding CSS Theme Code
I have to write two set of instructions for each steps, as some of you are using the default layout, and some of you are using the new layout.Backup your template before attempting this tutorial.
Step 1:
In old layout: Go to Dashboard - Design - Edit HTML - Expand Widget Templates.

In new layout: Go to Dashboard - Template - Edit Template HTML - Expand Widget Templates.
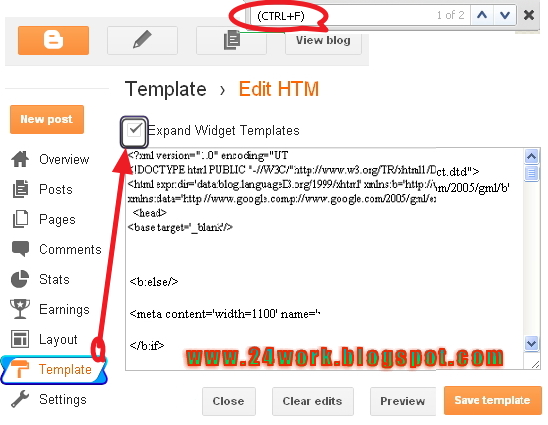
Now find (CTRL+F) this code in the template:
]]>
And immediately before it, paste this code:
#featured{
width:400px;
padding-right:250px;
position:relative;
height:250px;
background:#fff;
border:5px solid #ccc;
}
#featured ul.ui-tabs-nav{
position:absolute;
top:0; left:400px;
list-style:none;
padding:0; margin:0;
width:250px;
}
#featured ul.ui-tabs-nav li{
padding:1px 0; padding-left:13px;
font-size:12px;
color:#666;
}
#featured ul.ui-tabs-nav li span{
font-size:11px; font-family:Verdana;
line-height:18px;
}
#featured .ui-tabs-panel{
width:400px; height:250px;
background:#999; position:relative;
overflow:hidden;
}
#featured .ui-tabs-hide{
display:none;
}
#featured li.ui-tabs-nav-item a{/*On Hover Style*/
display:block;
height:60px;
color:#333; background:#fff;
line-height:20px;
outline:none;
}
#featured li.ui-tabs-nav-item a:hover{
background:#f2f2f2;
}
#featured li.ui-tabs-selected{ /*Selected tab style*/
background:url('selected-item.gif') top left no-repeat;
}
#featured ul.ui-tabs-nav li.ui-tabs-selected a{
background:#ccc;
}
#featured ul.ui-tabs-nav li img{
float:left; margin:2px 5px;
background:#fff;
padding:2px;
border:1px solid #eee;
}
#featured .ui-tabs-panel .info{
position:absolute;
top:180px; left:0;
height:70px; width: 400px;
background: url('transparent-bg.png');
}
#featured .info h2{
font-size:18px; font-family:Georgia, serif;
color:#fff; padding:5px; margin:0;
overflow:hidden;
}
#featured .info p{
margin:0 5px;
font-family:Verdana; font-size:11px;
line-height:15px; color:#f0f0f0;
}
#featured .info a{
text-decoration:none;
color:#fff;
}
#featured .info a:hover{
text-decoration:underline;
}
Adding Script Code
Now find (CTRL+F) this code in the template:
Step 2:And find the code
Step 3: Now add the following code just before the tag.

And now click Save Template
Adding HTML Code
I have to write two set of instructions for each steps, as some of you are using the default layout, and some of you are using the new layout. So, let's see how to install this cool widget in your blog..
Step 4:
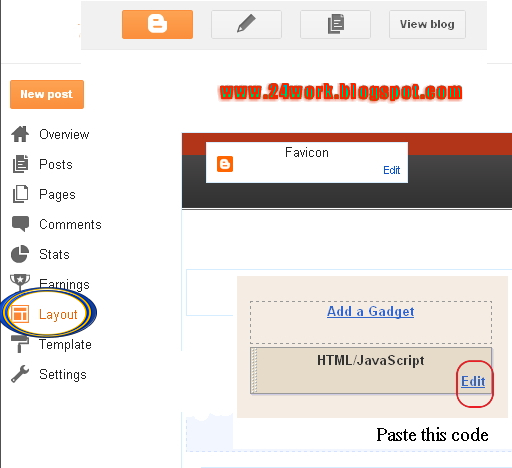
If you're using the old Blogger interface: Go to Dashboard - Design - Page Elements - Add a Gadget.

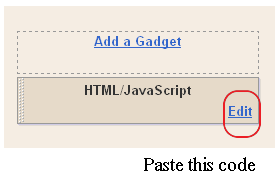
3.Select 'HTML/Javascript' and add the one of code given below
4. Now Click On Save 'JavaScript' You are done.
 Install Mac OS X on Intel/AMD PC using iATKOS v7
 How to remove "showing post with label" in Blogger
 How to add Google Buzz to Blogspot blog
 Chat live with your blog visitors using Yahoo Pingbox

Install Mac OS X on Intel/AMD PC using iATKOS v7
Description goes here, this is just a test description....read more

How to remove "showing post with label" in Blogger
Description goes here, this is just a test description....read more

How to add Google Buzz to Blogspot blog
Description goes here, this is just a test description....read more

Chat live with your blog visitors using yahoo
Description goes here, this is just a test description....read more
And now click Save
................................................................................................
................................................................................................
................................................................................................
Simple jQuery Featured Content Slider for Blogger Blog
How to Install This Widget on Blogger?
Steps...
A. Adding CSS Theme Code
B. Adding Script Code
C. Adding HTML Code
Adding CSS Theme Code
In old layout: Go to Dashboard - Design - Edit HTML - Expand Widget Templates.
In new layout: Go to Dashboard - Template - Edit Template HTML - Expand Widget Templates.
Now find (CTRL+F) this code in the template:
]]>
And immediately before it, paste this code:
#jFlowSlide{ background:#f8f8f8; font-family: Georgia; }
#myController { font-family: Georgia; padding:2px 0; width:610px; background:#000000; }
#myController span.jFlowSelected { background:#43A0D5;margin-right:0px; }
.slide-wrapper { padding: 5px; }
.slide-thumbnail { width:300px; float:left; }
.slide-thumbnail img {max-width:300px; }
.slide-details { width:290px; float:right; margin-left:10px;}
.slide-details h2 { font-size:1.5em; font-style: italic; font-weight:normal; line-height: 1; margin:0; }
.slide-details .description { margin-top:10px; }
.jFlowControl, .jFlowPrev, .jFlowNext { color:#FFF; cursor:pointer; padding-left:5px; padding-right:5px; padding-top:2px; padding-bottom:2px; }
.jFlowControl:hover, .jFlowPrev:hover, .jFlowNext:hover { background: #43A0D5; }
Adding Script Code
Now find (CTRL+F) this code in the template:
Step 2:And find the code
Step 3: Now add the following code just before the tag.
And now click Save Template
Adding HTML Code
So, let's see how to install this cool widget in your blog..
1. Sign into Blogger dashboard
old Blogger interface: Go to Dashboard - Design - Page Elements - Add a Gadget.If you're using the new Blogger interface: Go to Dashboard - Layout - Add a Gadget.Select 'HTML/Javascript' and add the one of code given below.Just copy and paste this code..
<-! Slide #1 Starts-->
<-! Slide #2 Starts-->
<-! Slide #3 Starts-->
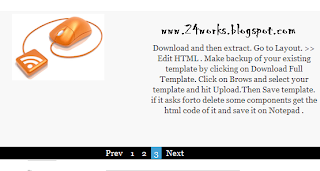
Prev
1
2
3
Next
And now click Save
t's Done.
Customization
Code 1. You can change the background colors in code 1 to suit your blog.
Code 2. First of all download http://safir85.ucoz.com/24work-blogspot/featured-post-s/freebloggerhelp-jquery.flow.1.2.auto.js and upload it to google sites.
You can change width, height and duration speed.
Code 3. As you look on code 3 there are 3 slide codes. First give the image link, add title and finally add description. Do same with all three codes. You can add more slide by adding the code:
Also you have to add
4
after
3
and so on for next slides.
................................................................................................
................................................................................................
................................................................................................
How To Add Smart Jquery Featured Slider to Blogger / Websites
How to Install This Widget on Blogger?
Steps...
A. Adding Script Code
B. Adding HTML Code
Adding Script Code
In old layout: Go to Dashboard - Design - Edit HTML - Expand Widget Templates.
In new layout: Go to Dashboard - Template - Edit Template HTML - Expand Widget Templates.
Now find (CTRL+F) this code in the template:
Step 2:And find the code
Step 3: Now add the following code just before the tag.
And now click Save Template
Adding HTML Code
So, let's see how to install this cool widget in your blog..
1. Sign into Blogger dashboard
old Blogger interface: Go to Dashboard - Design - Page Elements - Add a Gadget.If you're using the new Blogger interface: Go to Dashboard - Layout - Add a Gadget.Select 'HTML/Javascript' and add the one of code given below.Just copy and paste this code..
And now click Save
NOTE : Replace,
SLIDE-X-LINK-HERE with your real featured posts links.
SLIDE-X-IMAGE-ADDRESS-HERE with your real slide images addresses.
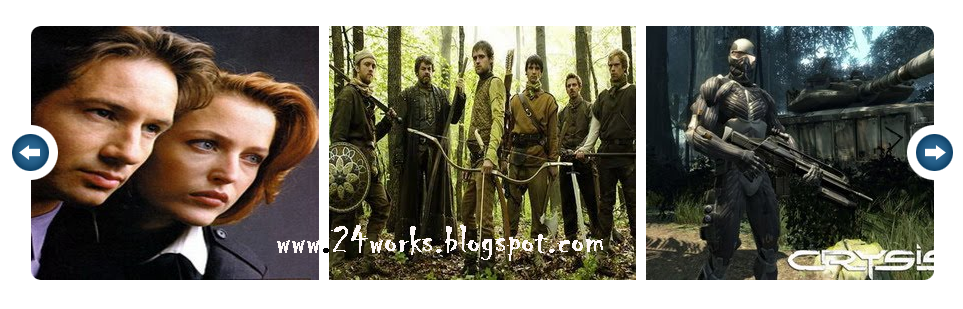
Look at the example below:


You are done.
................................................................................................
................................................................................................
................................................................................................
How To Create JQuery Featured Content Slideshow
How to Install This Widget on Blogger?
Steps...
A. Adding Script Code
B. Adding HTML Code
Adding Script Code
In old layout: Go to Dashboard - Design - Edit HTML - Expand Widget Templates.
In new layout: Go to Dashboard - Template - Edit Template HTML - Expand Widget Templates.
Now find (CTRL+F) this code in the template:
Step 2:And find the code
Step 3: Now add the following code just before the tag.
And now click Save Template
Adding HTML Code
So, let's see how to install this cool widget in your blog..
1. Sign into Blogger dashboard
old Blogger interface: Go to Dashboard - Design - Page Elements - Add a Gadget.If you're using the new Blogger interface: Go to Dashboard - Layout - Add a Gadget.Select 'HTML/Javascript' and add the one of code given below.Just copy and paste this code..
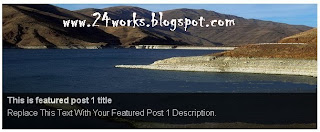
https://blogger.googleusercontent.com/img/b/R29vZ2xl/AVvXsEhY5d3Ji1KetlYA3PB7H6KOc01NoK0ZE4QGs3dc57IwS_-bKsukTsyWKGpsQcGG63NK6OV04fre2ZpxZ3rO7gwEpzJwv5xdp3SSV2XZGJ8K_1BOCXrIdXjsQVRAlr754puu12MCqmfP15g/s1600/1.jpg" title="This is featured post 1 title" alt="Replace This Text With Your Featured Post 1 Description." />
And now click Save
You can add more slides as you like.
Note : Replace images URLs,"This is featured post X title","Replace This Text With Your Featured Post X Description" with your content.
You are done.
................................................................................................
................................................................................................
................................................................................................
How To Add jQuery Featured Post Slider to blogger
How to Install This Widget on Blogger?
Steps...
A. Adding Script Code
B. Adding HTML Code
Adding Script Code
In old layout: Go to Dashboard - Design - Edit HTML - Expand Widget Templates.
In new layout: Go to Dashboard - Template - Edit Template HTML - Expand Widget Templates.
Now find (CTRL+F) this code in the template:
Step 2:And find the code
Step 3: Now add the following code just before the tag.
And now click Save Template
Note: Please host above images yourself.
Adding HTML Code
So, let's see how to install this cool widget in your blog..
1. Sign into Blogger dashboard
old Blogger interface: Go to Dashboard - Design - Page Elements - Add a Gadget.If you're using the new Blogger interface: Go to Dashboard - Layout - Add a Gadget.Select 'HTML/Javascript' and add the one of code given below.Just copy and paste this code..
And now click Save
................................................................................................
................................................................................................
................................................................................................
How To Add jQuery Images Slider to Blogger

How to Install This Widget on Blogger?
Steps...
A. Adding Script Code
B. Adding HTML Code
Adding Script Code
In old layout: Go to Dashboard - Design - Edit HTML - Expand Widget Templates.
In new layout: Go to Dashboard - Template - Edit Template HTML - Expand Widget Templates.
Now find (CTRL+F) this code in the template:
Step 2:And find the code
Step 3: Now add the following code just before the tag.
And now click Save Template
Note : You can change width value as your choice.
Adding HTML Code
So, let's see how to install this cool widget in your blog..
1. Sign into Blogger dashboard
old Blogger interface: Go to Dashboard - Design - Page Elements - Add a Gadget.If you're using the new Blogger interface: Go to Dashboard - Layout - Add a Gadget.Select 'HTML/Javascript' and add the one of code given below.Just copy and paste this code..


And now click Save
Note: Host above 2 images yourself.
................................................................................................
................................................................................................
................................................................................................
How To Add MooTools Featured Content Slider to blogger

How to Install This Widget on Blogger?
Steps...
A. Adding Script Code
B. Adding HTML Code
Adding Script Code
In old layout: Go to Dashboard - Design - Edit HTML - Expand Widget Templates.
In new layout: Go to Dashboard - Template - Edit Template HTML - Expand Widget Templates.
Now find (CTRL+F) this code in the template:
Step 2:And find the code
Step 3: Now add the following code just before the tag.
And now click Save Template
Important !!! : Download mootools.svn.js as a zip file and hostmootools.svn.js yourself.
You can change height,width,color,... if you like.
Adding HTML Code
So, let's see how to install this cool widget in your blog..
1. Sign into Blogger dashboard
old Blogger interface: Go to Dashboard - Design - Page Elements - Add a Gadget.If you're using the new Blogger interface: Go to Dashboard - Layout - Add a Gadget.Select 'HTML/Javascript' and add the one of code given below.Just copy and paste this code..


And now click Save
................................................................................................
................................................................................................
................................................................................................
Excellent Content SlideShow Slider to Blogger / WebSite

How to Install This Widget on Blogger?
Steps...
A. Adding CSS Theme Code
B. Adding Script Code
C. Adding HTML Code
Adding CSS Theme Code
In old layout: Go to Dashboard - Design - Edit HTML - Expand Widget Templates.
In new layout: Go to Dashboard - Template - Edit Template HTML - Expand Widget Templates.
Now find (CTRL+F) this code in the template:
]]>
And immediately before it, paste this code:
#slideshow {list-style:none; color:#fff}
#slideshow span {display:none}
#wrapper {width:506px; margin:50px auto; display:none}
#wrapper * {margin:0; padding:0}
#fullsize {position:relative; width:500px; height:300px; padding:2px; border:1px solid #ccc; background:#000}
#information {position:absolute; bottom:0; width:500px; height:0; background:#000; color:#fff; overflow:hidden; z-index:200; opacity:.7; filter:alpha(opacity=70)}
#information h3 {padding:4px 8px 3px; font-size:14px}
#information p {padding:0 8px 8px}
#image {width:500px}
#image img {position:absolute; z-index:25; width:auto}
.imgnav {position:absolute; width:25%; height:306px; cursor:pointer; z-index:150}
#imgprev {left:0; background:url(https://blogger.googleusercontent.com/img/b/R29vZ2xl/AVvXsEhX4F-xx5H5aMFb0vbeqCgWs-sDo3dhhSMAr3_je_sOD1U4Rc5Fl_YY1RKJ86g_uwrahScCToaM8uFl4PYztmK6Vi-UkJjv2H_UbkQXrCULJ3dy1pvk6sxiM_A5J1on8i8QZvhh4SyosAb8/) left center no-repeat}
#imgnext {right:0; background:url(https://blogger.googleusercontent.com/img/b/R29vZ2xl/AVvXsEi25hUI4N1ToiFXhKMd4NTAviDn3DaBzuFX2ibN2ieAHeMFdI1mgUhHDKkXltP7kULLHcbClmLLUf4ugK0I6zsD6gEvGeEFQuXiQOzictwrB6MbjGOnhlIQpGsfpJAqqhqeaHiGyHT9xKPH/) right center no-repeat}
#imglink {position:absolute; height:306px; width:100%; z-index:100; opacity:.4; filter:alpha(opacity=40)}
.linkhover {background:url(https://blogger.googleusercontent.com/img/b/R29vZ2xl/AVvXsEg20GO551zg1GI-CGleEd_zkbMi0ngtkuzIN8OB2Luya2Of2wWxjn9fIXMcZFGkG_gpjRXxjQFkg47uL4Kj4KFDkUy-K7RKfAl1CWoTubsCN95BDd6tmfUvP7CdyzpEUWD1355FP4sjNh29/) center center no-repeat}
#thumbnails {margin-top:15px}
#slideleft {float:left; width:20px; height:81px; background:url(https://blogger.googleusercontent.com/img/b/R29vZ2xl/AVvXsEivny-69faEcsiD1hnVs57DWEwCPdZ-YsXgyN0DHLwL262RAAr6gjokcxAhSjsC3IkppCgLgz4y2khFB0kgAJyQsnZ-z2hA8Vc_n3wOLCa6T4eSDLC2Q_NkyEpGFQkEkXaevy7o9wm9OXQf/) center center no-repeat; background-color:#222}
#slideleft:hover {background-color:#333}
#slideright {float:right; width:20px; height:81px; background:#222 url(https://blogger.googleusercontent.com/img/b/R29vZ2xl/AVvXsEiE80cdX7Ifh3nMIkpX8bDLa8d22dG_FiUXWJspXvxSAEujW9XqJ4Cj0pfLBdog7UxbgKdfa9l3wCqjgAFCQQYFXqUq1lOb8AGszCcG69q6SpSKGAp0jBPA2uwCDq0GJ6M7LAdwS18uE_45/) center center no-repeat}
#slideright:hover {background-color:#333}
#slidearea {float:left; position:relative; width:456px; margin-left:5px; height:81px; overflow:hidden}
#slider {position:absolute; left:0; height:81px}
#slider img {cursor:pointer; border:1px solid #666; padding:2px}
Adding Script Code
Now find (CTRL+F) this code in the template:
Step 2:And find the code
Step 3: Now add the following code just before the tag.
And now click Save Template
Important !!! : Download compressed.js and 5 images as a zip file, andhost compressed.js and images yourself.
Adding HTML Code
So, let's see how to install this cool widget in your blog..
1. Sign into Blogger dashboard
old Blogger interface: Go to Dashboard - Design - Page Elements - Add a Gadget.If you're using the new Blogger interface: Go to Dashboard - Layout - Add a Gadget.Select 'HTML/Javascript' and add the one of code given below.Just copy and paste this code..
Enter Title 1 Here
https://blogger.googleusercontent.com/img/b/R29vZ2xl/AVvXsEjBjGVzJDoiaTeYQASIQDZjsr3yiKVJPUfLu5O4t5uloIMAHF_oBjlcQ3sUNRL0C4Vl92C68ik-3s1JpR8DfegYXs1rFU2uZnrvK1LbyW_jiuqp1CKiifczbi9oZH9BqEYxVnaiAx6TwfqV/+1+big.jpgEnter Description 1 Here.

Enter Title 2 Here
https://blogger.googleusercontent.com/img/b/R29vZ2xl/AVvXsEjAi1QmeQsQ7Id6CgYJ3oiniB8BbTDOFAkFA0YHRWKXkqrvJisBoCXeTqV9mXajn7WG9WXrRdldYsljP3cilgnNHHIZfqzGYAfJPj709-LtEi1E2B9NLAvIctQhtAU5-FoncQxRvEtXWa32/+2+big.jpgEnter Description 2 Here.

Enter Title 3 Here
https://blogger.googleusercontent.com/img/b/R29vZ2xl/AVvXsEjPDFvZ0OM8g9GPzNTGQcKwSst23ZSD6yinTfTGlEc1LMWR7JnWTvI80f1VrPdrbmIU8C6iE4pNqKgi-Frl7NAeMR46QjgBy2AKJlG8bfRREuvZnEsbWxAjeFKL9OtXES2anoh5k1uqvdzZ/+3+big.jpgEnter Description 3 Here.

Enter Title 4 Here
https://blogger.googleusercontent.com/img/b/R29vZ2xl/AVvXsEjoqrLstpm5GP-1FWIVg8KWfC98sZEivls6ePWImlHiByLDFiPtYtEjvTjtaNWzVNFYGRUeRtb2HZiPo2PuAvatwxl0o86gNYabUGoifWOB4eGrjyC1QFZVS7644NovdrNwyPfNHGBDsGn5/+4+big.jpgEnter Description 4 Here.

Enter Title 5 Here
https://blogger.googleusercontent.com/img/b/R29vZ2xl/AVvXsEgp_gyPxdUMNC50BgNUygC0lrpOSxvD9Y9nh3VcylcWjfH7PCtP42uu-rJ-9tjlOo-Wlx_StAAozFRuMN_QYKLq_oHM_KRR0Yc7VQFJdBTlFTu3sBaUpvZeoAemuZI4-qVuSTa8PHeQNQFD/+5+big.jpgEnter Description 5 Here.

Enter Title 6 Here
https://blogger.googleusercontent.com/img/b/R29vZ2xl/AVvXsEjm92jpzYoUpFOXc4OwTUxiROSPiu2zea_SR4oiXasT4aHiewTsfeKfhlAEZdMbHqUmqVCX6Qga1bRtJX0MDjqFaQGsQnN_O3qdnkAXTxVLIWeULdbaXTMWHtpYSDYK4EPEcM5e6hju5eMO/+6+big.jpgEnter Description 6 Here.

Enter Title 7 Here
https://blogger.googleusercontent.com/img/b/R29vZ2xl/AVvXsEh_h__JSDb8hpLE7dE9gHXHxbehyphenhyphenV6tEQCvwpsqCO6dXad_OGoieb_PiOZ2XIMkqFIvfcAZJLCp9NBRj73LrukMpoVWB-K3PzS46f7JS3FZvr5HkHcc_gtzXWdIo6N6nJhe9hF4LaCBUQLX/+7+big.jpegEnter Description 7 Here.

Enter Title 8 Here
https://blogger.googleusercontent.com/img/b/R29vZ2xl/AVvXsEjFLzh9Q6LmFTgKba8LEsGC6QLv5rlztFlUU0sydeoM6Hpc3EUv-CCL4utGMihlZ-OaQhAPR9Pvf8qbhRTwgji1Vl9DrXzefgU7IlKCWq1hdNijdChuIP3MFdvOl1dMAEZlYooKcR1e9TQS/+8+big.jpgEnter Description 8 Here.

Enter Title 9 Here
https://blogger.googleusercontent.com/img/b/R29vZ2xl/AVvXsEgS823yI7qjMOfH2CYiwGjZtJ6uDMEs8y2ATogJMvD5ZGwYdAATjsCXrrA0JPJaiCyLaocjBzkNK81l5H5pgxRYHk1GthZdBIRCIugy90othbLfYrKUYCuat_aI3ipgEXDoLMZ8c9CDE28q/+9+big.jpgEnter Description 9 Here.

And now click Save
Featured Images Slideshow Slider to Blogger / Websites

How to Install This Widget on Blogger?
Steps...
A. Adding Script Code
B. Adding HTML Code
Adding Script Code
In old layout: Go to Dashboard - Design - Edit HTML - Expand Widget Templates.
In new layout: Go to Dashboard - Template - Edit Template HTML - Expand Widget Templates.
Now find (CTRL+F) this code in the template:
Step 2:And find the code
Step 3: Now add the following code just before the tag.
And now click Save Template
Note : You can change width,height,... as you like.
Adding HTML Code
So, let's see how to install this cool widget in your blog..
1. Sign into Blogger dashboard
old Blogger interface: Go to Dashboard - Design - Page Elements - Add a Gadget.If you're using the new Blogger interface: Go to Dashboard - Layout - Add a Gadget.Select 'HTML/Javascript' and add the one of code given below.Just copy and paste this code..
And now click Save
Note : Replace IMAGE-X-LINKs and IMAGE-X-THUMBNAIL-LINKs with your image links.
................................................................................................
................................................................................................
................................................................................................
Smooth Jquery Featured Post Slideshow For Blogger

How to Install This Widget on Blogger?
Steps...
A. Adding Script Code
B. Adding HTML Code
Adding Script Code
In old layout: Go to Dashboard - Design - Edit HTML - Expand Widget Templates.
In new layout: Go to Dashboard - Template - Edit Template HTML - Expand Widget Templates.
Now find (CTRL+F) this code in the template:
Step 2:And find the code
Step 3: Now add the following code just before the tag.
And now click Save Template
NOTE : To change the speed of slideshow, change the value 4000.
Adding HTML Code
So, let's see how to install this cool widget in your blog..
1. Sign into Blogger dashboard
old Blogger interface: Go to Dashboard - Design - Page Elements - Add a Gadget.If you're using the new Blogger interface: Go to Dashboard - Layout - Add a Gadget.Select 'HTML/Javascript' and add the one of code given below.Just copy and paste this code..
YOUR-LINK-HERE">
Crysis : Download Full Version
YOUR-LINK-HERE">
Halo 3 : Play Game Online
YOUR-LINK-HERE">
Avatar : Watch Movie Now !!!
YOUR-LINK-HERE">
Call Of Duty 4 : Get Here


And now click Save
NOTE : Replace YOUR-LINK-HERE and images with your content.
................................................................................................
................................................................................................
................................................................................................
How To Add Featured Post Content Slider to Blogger

How to Install This Widget on Blogger?
Steps...
A. Adding Script Code
B. Adding HTML Code
Adding Script Code
In old layout: Go to Dashboard - Design - Edit HTML - Expand Widget Templates.
In new layout: Go to Dashboard - Template - Edit Template HTML - Expand Widget Templates.
Now find (CTRL+F) this code in the template:
Step 2:And find the code
Step 3: Now add the following code just before the tag.
Note : Host prev.png and nxt.png images yourself.
And now click Save Template
NOTE : To change the speed of slideshow, change the value 4000.
Adding HTML Code
So, let's see how to install this cool widget in your blog..
1. Sign into Blogger dashboard
old Blogger interface: Go to Dashboard - Design - Page Elements - Add a Gadget.If you're using the new Blogger interface: Go to Dashboard - Layout - Add a Gadget.Select 'HTML/Javascript' and add the one of code given below.Just copy and paste this code..
And now click Save
Note : Replace URL-of-Post-X , Title-of-Post-X , Slide X Description [...] , Slide-X-Image-Address with your content.
Use width=270px and height=170px images for your slides.
And also you can add many more slide to this widget.
................................................................................................
................................................................................................
................................................................................................
How To Add Mootools Recent Post Slider to blogger

How to Install This Widget on Blogger?
Steps...
Adding Script Code
In old layout: Go to Dashboard - Design - Edit HTML - Expand Widget Templates.
In new layout: Go to Dashboard - Template - Edit Template HTML - Expand Widget Templates.
Now find (CTRL+F) this code in the template:
Step 2:And find the code
Step 3: Now add the following code just before the tag.
Now again scroll down to where you see below code:
And immediately before it, paste this code:


Replace "http://bdlab.blogspot.com" with your blog address.
Replace images addresses with your images addresses.
Note: You can place above code as your choice.For explanation I place it just before
And now click Save Template
................................................................................................
................................................................................................
................................................................................................
How To Add jQuery Featured Content Slideshow to Blogger

How to Install This Widget on Blogger?
Steps...
A. Adding Script Code
B. Adding HTML Code
Adding Script Code
In old layout: Go to Dashboard - Design - Edit HTML - Expand Widget Templates.
In new layout: Go to Dashboard - Template - Edit Template HTML - Expand Widget Templates.
Now find (CTRL+F) this code in the template:
Step 2:And find the code
Step 3: Now add the following code just before the tag.
And now click Save Template
Adding HTML Code
So, let's see how to install this cool widget in your blog..
1. Sign into Blogger dashboard
old Blogger interface: Go to Dashboard - Design - Page Elements - Add a Gadget.If you're using the new Blogger interface: Go to Dashboard - Layout - Add a Gadget.Select 'HTML/Javascript' and add the one of code given below.Just copy and paste this code..


And now click Save
................................................................................................
................................................................................................
................................................................................................
How To Add jQuery Featured Content Slider to Blogger

How to Install This Widget on Blogger?
Steps...
A. Adding Script Code
B. Adding HTML Code
Adding Script Code
In old layout: Go to Dashboard - Design - Edit HTML - Expand Widget Templates.
In new layout: Go to Dashboard - Template - Edit Template HTML - Expand Widget Templates.
Now find (CTRL+F) this code in the template:
Step 2:And find the code
Step 3: Now add the following code just before the tag.
And now click Save Template
Adding HTML Code
So, let's see how to install this cool widget in your blog..
1. Sign into Blogger dashboard
old Blogger interface: Go to Dashboard - Design - Page Elements - Add a Gadget.If you're using the new Blogger interface: Go to Dashboard - Layout - Add a Gadget.Select 'HTML/Javascript' and add the one of code given below.Just copy and paste this code..


And now click Save
Note : Replace POST-LINK-HERE,LINK-TITLE-HERE,POST-TITLE-HERE,POST-DESCRIPTION-HERE,IMAGE-TITLE-HERE and Image Addresses with your details.
................................................................................................
................................................................................................
................................................................................................
Add Beautiful jQuery Auto Playing Featured Content Image Slider to Blogger

How to Install This Widget on Blogger?
Steps...
A. Adding CSS Theme Code
B. Adding Script Code
C. Adding HTML Code
Adding CSS Theme Code
In old layout: Go to Dashboard - Design - Edit HTML - Expand Widget Templates.
In new layout: Go to Dashboard - Template - Edit Template HTML - Expand Widget Templates.
Now find (CTRL+F) this code in the template:
]]>
And immediately before it, paste this code:
*{
margin:0;
padding:0;
}
html{
height:100%;
}
a img{
border:0;
}
div.wrap{
width:540px;
margin:0 auto;
text-align:left;
}
div#top div#nav{
float:left;
clear:both;
width:540px;
height:52px;
margin:22px 0 0;
background:url url(https://blogger.googleusercontent.com/img/b/R29vZ2xl/AVvXsEjlS_Gf48EC6wg_IeeaQk-62nrMKhkHlYdcMmxzVHnw4KiJDOZxqjDLKxAon9tl8GoK7Ecbo9MYj62AA50vYN4N63H3eqqknnc-reXOaO-ZO1pJmGGTnlSAZ0XiDxrY93oYg3sKh33vXyTv/s1600/navbgq.png) 0 0 no-repeat;
}
div#top div#nav ul{
float:left;
width:700px;
height:52px;
list-style-type:none;
}
div#nav ul li{
float:left;
height:52px;
}
div#nav ul li a{
border:0;
height:52px;
display:block;
line-height:52px;
text-indent:-9999px;
}
div#header{
margin:-1px 0 0;
}
div#video-header{
height:683px;
margin:-1px 0 0;
}
div#header div#slide-holder{
z-index:40;
width:540px;
height:299px;
position:absolute;
}
div#header div#slide-holder div#slide-runner{
top:9px;
left:9px;
width:540px;
height:278px;
overflow:hidden;
position:absolute;
}
div#header div#slide-holder img{
margin:0;
display:none;
position:absolute;
}
div#header div#slide-holder div#slide-controls{
left:0;
bottom:228px;
width:540px;
height:46px;
display:none;
position:absolute;
background:url(https://blogger.googleusercontent.com/img/b/R29vZ2xl/AVvXsEg0lchpGsQb5ZCgwLaEW9ANwRDsoDsgPyJSa9UjWX8qq7nLBNIPx_Vh4IDNfBuEl68AuFYeU-uH3c_ULWfAiXhfx4o_pgN8ai9kMMdnOMR8skoEhFkbM2KpRe7uP5KWWMou7mw75rNH0KB8/s1600/slidebg.png) 0 0;
}
div#header div#slide-holder div#slide-controls p.text{
float:left;
color:#fff;
display:inline;
font-size:10px;
line-height:16px;
margin:15px 0 0 20px;
text-transform:uppercase;
}
div#header div#slide-holder div#slide-controls p#slide-nav{
float:right;
height:24px;
display:inline;
margin:11px 15px 0 0;
}
div#header div#slide-holder div#slide-controls p#slide-nav a{
float:left;
width:24px;
height:24px;
display:inline;
font-size:11px;
margin:0 5px 0 0;
line-height:24px;
font-weight:bold;
text-align:center;
text-decoration:none;
background-position:0 0;
background-repeat:no-repeat;
color:#fff;
}
div#header div#slide-holder div#slide-controls p#slide-nav a.on{
background-position:0 -24px;
}
div#header div#slide-holder div#slide-controls p#slide-nav a{background-image:url(https://blogger.googleusercontent.com/img/b/R29vZ2xl/AVvXsEj4v1P-jOTmY36KYwDyfzezV2dt5QQUlyrRoCisT6kOkAoXC9PqAc5YpXUZSi12qb9S7zSp0NuSWk1k2bF9VLYOjmDD_giXpYTjgXh8MGzsJJ0f0DpCK6KtrN8q0H24ZlTu2MenONOWCjH4/s1600/sildenav.png);}
div#nav ul li a{background:url(images/nav.png) no-repeat;}
margin:0;
padding:0;
}
html{
height:100%;
}
a img{
border:0;
}
div.wrap{
width:540px;
margin:0 auto;
text-align:left;
}
div#top div#nav{
float:left;
clear:both;
width:540px;
height:52px;
margin:22px 0 0;
background:url url(https://blogger.googleusercontent.com/img/b/R29vZ2xl/AVvXsEjlS_Gf48EC6wg_IeeaQk-62nrMKhkHlYdcMmxzVHnw4KiJDOZxqjDLKxAon9tl8GoK7Ecbo9MYj62AA50vYN4N63H3eqqknnc-reXOaO-ZO1pJmGGTnlSAZ0XiDxrY93oYg3sKh33vXyTv/s1600/navbgq.png) 0 0 no-repeat;
}
div#top div#nav ul{
float:left;
width:700px;
height:52px;
list-style-type:none;
}
div#nav ul li{
float:left;
height:52px;
}
div#nav ul li a{
border:0;
height:52px;
display:block;
line-height:52px;
text-indent:-9999px;
}
div#header{
margin:-1px 0 0;
}
div#video-header{
height:683px;
margin:-1px 0 0;
}
div#header div#slide-holder{
z-index:40;
width:540px;
height:299px;
position:absolute;
}
div#header div#slide-holder div#slide-runner{
top:9px;
left:9px;
width:540px;
height:278px;
overflow:hidden;
position:absolute;
}
div#header div#slide-holder img{
margin:0;
display:none;
position:absolute;
}
div#header div#slide-holder div#slide-controls{
left:0;
bottom:228px;
width:540px;
height:46px;
display:none;
position:absolute;
background:url(https://blogger.googleusercontent.com/img/b/R29vZ2xl/AVvXsEg0lchpGsQb5ZCgwLaEW9ANwRDsoDsgPyJSa9UjWX8qq7nLBNIPx_Vh4IDNfBuEl68AuFYeU-uH3c_ULWfAiXhfx4o_pgN8ai9kMMdnOMR8skoEhFkbM2KpRe7uP5KWWMou7mw75rNH0KB8/s1600/slidebg.png) 0 0;
}
div#header div#slide-holder div#slide-controls p.text{
float:left;
color:#fff;
display:inline;
font-size:10px;
line-height:16px;
margin:15px 0 0 20px;
text-transform:uppercase;
}
div#header div#slide-holder div#slide-controls p#slide-nav{
float:right;
height:24px;
display:inline;
margin:11px 15px 0 0;
}
div#header div#slide-holder div#slide-controls p#slide-nav a{
float:left;
width:24px;
height:24px;
display:inline;
font-size:11px;
margin:0 5px 0 0;
line-height:24px;
font-weight:bold;
text-align:center;
text-decoration:none;
background-position:0 0;
background-repeat:no-repeat;
color:#fff;
}
div#header div#slide-holder div#slide-controls p#slide-nav a.on{
background-position:0 -24px;
}
div#header div#slide-holder div#slide-controls p#slide-nav a{background-image:url(https://blogger.googleusercontent.com/img/b/R29vZ2xl/AVvXsEj4v1P-jOTmY36KYwDyfzezV2dt5QQUlyrRoCisT6kOkAoXC9PqAc5YpXUZSi12qb9S7zSp0NuSWk1k2bF9VLYOjmDD_giXpYTjgXh8MGzsJJ0f0DpCK6KtrN8q0H24ZlTu2MenONOWCjH4/s1600/sildenav.png);}
div#nav ul li a{background:url(images/nav.png) no-repeat;}
Adding Script Code
Now find (CTRL+F) this code in the template:
Step 2:And find the code
Step 3: Now add the following code just before the tag.
Now find (CTRL+F) this code in the template:
Step 2:And find the code


No comments:
Post a Comment