"http://bdlab.blogspot.com" with your blog address.
images addresses with your images addresses.
And now click
Save Template ................................................................................................
................................................................................................
................................................................................................How To Add jQuery Featured Content Slideshow to Blogger How to Install This Widget on Blogger?
Steps...
A. Adding Script Code
B. Adding HTML Code
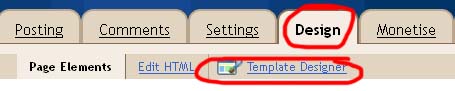
Adding Script CodeIn old layout: Go to Dashboard - Design - Edit HTML - Expand Widget Templates.
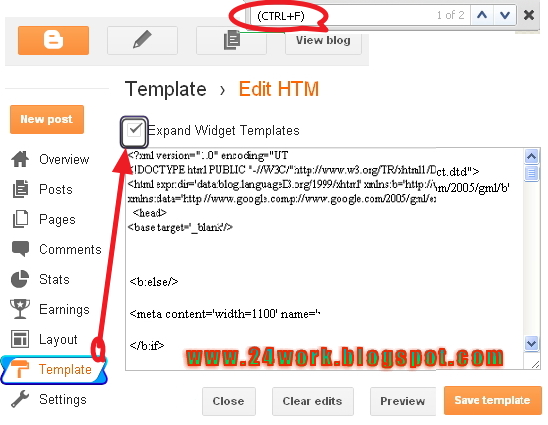
In new layout: Go to Dashboard - Template - Edit Template HTML - Expand Widget Templates.
Now find (CTRL+F) this code in the template:
Step 2:And find the code
Step 3: Now add the following code just before the
tag.
And now click
Save Template Adding HTML CodeSo, let's see how to install this cool widget in your blog..
1. Sign into Blogger dashboard
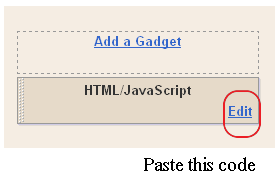
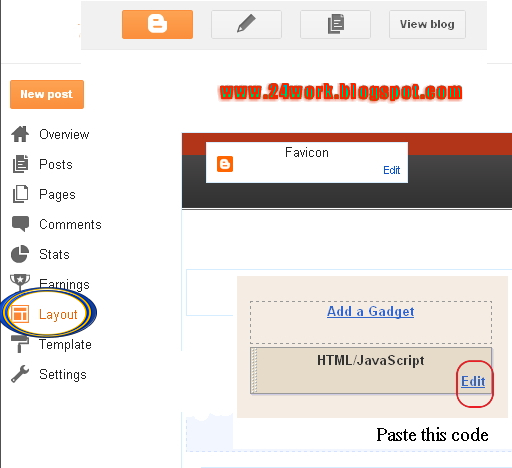
old Blogger interface: Go to Dashboard - Design - Page Elements - Add a Gadget.If you're using the new Blogger interface: Go to Dashboard - Layout - Add a Gadget.Select 'HTML/Javascript' and add the one of code given below.Just copy and paste this code..
And now click
Save ................................................................................................
................................................................................................
................................................................................................How To Add jQuery Featured Content Slider to BloggerHow to Install This Widget on Blogger?
Steps...
A. Adding Script Code
B. Adding HTML Code
Adding Script CodeIn old layout: Go to Dashboard - Design - Edit HTML - Expand Widget Templates.
In new layout: Go to Dashboard - Template - Edit Template HTML - Expand Widget Templates.
Now find (CTRL+F) this code in the template:
Step 2:And find the code
Step 3: Now add the following code just before the
tag.
And now click
Save Template Adding HTML CodeSo, let's see how to install this cool widget in your blog..
1. Sign into Blogger dashboard
old Blogger interface: Go to Dashboard - Design - Page Elements - Add a Gadget.If you're using the new Blogger interface: Go to Dashboard - Layout - Add a Gadget.Select 'HTML/Javascript' and add the one of code given below.Just copy and paste this code..
And now click
Save Note : Replace POST-LINK-HERE,LINK-TITLE-HERE,POST-TITLE-HERE,POST-DESCRIPTION-HERE,IMAGE-TITLE-HERE and Image Addresses with your details.
................................................................................................
................................................................................................
................................................................................................Add Beautiful jQuery Auto Playing Featured Content Image Slider to BloggerHow to Install This Widget on Blogger?
Steps...
A. Adding CSS Theme Code
B. Adding Script Code
C. Adding HTML Code
Adding CSS Theme CodeIn old layout: Go to Dashboard - Design - Edit HTML - Expand Widget Templates.
In new layout: Go to Dashboard - Template - Edit Template HTML - Expand Widget Templates.
Now find (CTRL+F) this code in the template:
]]>
And immediately
before it, paste this code:
*{
margin:0;
padding:0;
}
html{
height:100%;
}
a img{
border:0;
}
div.wrap{
width:540px;
margin:0 auto;
text-align:left;
}
div#top div#nav{
float:left;
clear:both;
width:540px;
height:52px;
margin:22px 0 0;
background:url url(https://blogger.googleusercontent.com/img/b/R29vZ2xl/AVvXsEjlS_Gf48EC6wg_IeeaQk-62nrMKhkHlYdcMmxzVHnw4KiJDOZxqjDLKxAon9tl8GoK7Ecbo9MYj62AA50vYN4N63H3eqqknnc-reXOaO-ZO1pJmGGTnlSAZ0XiDxrY93oYg3sKh33vXyTv/s1600/navbgq.png) 0 0 no-repeat;
}
div#top div#nav ul{
float:left;
width:700px;
height:52px;
list-style-type:none;
}
div#nav ul li{
float:left;
height:52px;
}
div#nav ul li a{
border:0;
height:52px;
display:block;
line-height:52px;
text-indent:-9999px;
}
div#header{
margin:-1px 0 0;
}
div#video-header{
height:683px;
margin:-1px 0 0;
}
div#header div#slide-holder{
z-index:40;
width:540px;
height:299px;
position:absolute;
}
div#header div#slide-holder div#slide-runner{
top:9px;
left:9px;
width:540px;
height:278px;
overflow:hidden;
position:absolute;
}
div#header div#slide-holder img{
margin:0;
display:none;
position:absolute;
}
div#header div#slide-holder div#slide-controls{
left:0;
bottom:228px;
width:540px;
height:46px;
display:none;
position:absolute;
background:url(https://blogger.googleusercontent.com/img/b/R29vZ2xl/AVvXsEg0lchpGsQb5ZCgwLaEW9ANwRDsoDsgPyJSa9UjWX8qq7nLBNIPx_Vh4IDNfBuEl68AuFYeU-uH3c_ULWfAiXhfx4o_pgN8ai9kMMdnOMR8skoEhFkbM2KpRe7uP5KWWMou7mw75rNH0KB8/s1600/slidebg.png) 0 0;
}
div#header div#slide-holder div#slide-controls p.text{
float:left;
color:#fff;
display:inline;
font-size:10px;
line-height:16px;
margin:15px 0 0 20px;
text-transform:uppercase;
}
div#header div#slide-holder div#slide-controls p#slide-nav{
float:right;
height:24px;
display:inline;
margin:11px 15px 0 0;
}
div#header div#slide-holder div#slide-controls p#slide-nav a{
float:left;
width:24px;
height:24px;
display:inline;
font-size:11px;
margin:0 5px 0 0;
line-height:24px;
font-weight:bold;
text-align:center;
text-decoration:none;
background-position:0 0;
background-repeat:no-repeat;
color:#fff;
}
div#header div#slide-holder div#slide-controls p#slide-nav a.on{
background-position:0 -24px;
}
div#header div#slide-holder div#slide-controls p#slide-nav a{background-image:url(https://blogger.googleusercontent.com/img/b/R29vZ2xl/AVvXsEj4v1P-jOTmY36KYwDyfzezV2dt5QQUlyrRoCisT6kOkAoXC9PqAc5YpXUZSi12qb9S7zSp0NuSWk1k2bF9VLYOjmDD_giXpYTjgXh8MGzsJJ0f0DpCK6KtrN8q0H24ZlTu2MenONOWCjH4/s1600/sildenav.png);}
div#nav ul li a{background:url(images/nav.png) no-repeat;}
Adding Script CodeNow find (CTRL+F) this code in the template:
Step 2:And find the code
Step 3: Now add the following code just before the
tag.
Now find (CTRL+F) this code in the template:
Step 2:And find the code
Step 3: Now add the following code just before the
tag.
And now click
Save Template Adding HTML CodeSo, let's see how to install this cool widget in your blog..
1. Sign into Blogger dashboard
old Blogger interface: Go to Dashboard - Design - Page Elements - Add a Gadget.If you're using the new Blogger interface: Go to Dashboard - Layout - Add a Gadget.Select 'HTML/Javascript' and add the one of code given below.Just copy and paste this code..
And now click
Save Replace highlighted text with your blog post link,image link and title.
This is the end of the tutorial. I hope you will love it. If you have any kind of problem in implementing this tutorial please feel free to ask me.
................................................................................................
................................................................................................
................................................................................................Adding jQuery Posts Slider To Blogger BlogHow to Install This Widget on Blogger?
Steps...
A. Adding CSS Theme Code
B. Adding Script Code
C. Adding HTML Code
Adding CSS Theme CodeIn old layout: Go to Dashboard - Design - Edit HTML - Expand Widget Templates.
In new layout: Go to Dashboard - Template - Edit Template HTML - Expand Widget Templates.
Now find (CTRL+F) this code in the template:
]]>
And immediately
before it, paste this code:
#slider {
background:url(https://blogger.googleusercontent.com/img/b/R29vZ2xl/AVvXsEhFkvmjhbsCglSVrdnIZp1B2YTSfLL0G2yopk20HGXcxF4rYtpq3kNylJFJWc1sKwZWoBX0mN5rdy9HyU_MdiB-lUQvOfjiSIHQSWCDQlgVIJ218Qu5WkfIOhmoltOrM0H0a_l5q9aNNXeG/s1600/Adding+A+jQuery+Posts+Slider+To+Blogger+Blog.png);
height: 254px;
width: 983px;
overflow: hidden;
position: relative;
margin: 5px 0;
}
#mover {
width: auto;
position:absolute;
overflow:hidden;
}
.slide {
padding: 20px 0px;
width: 1000px;
float: left;
position: relative;
height:200px;
}
.slide h2 {
font-family:georgia, Helvetica, Sans-Serif;
font-size: 24px;
position: absolute;
top: 20px;
left: 1px;
color: #ac0000;
padding:0px 0px 0px 30px;
margin:0px 0px;
width:500px;
overflow:hidden;
}
.slide h2 a:link, .slide h2 a:visited {
color:#fff;
background-color: transparent;
}
.slide h2 a:hover {
color: #ddd;
background-color: transparent;
}
.slide p {
color: #999;
position: absolute;
top: 100px;
left: 1px;
font-size: 12px;
font-family:georgia, Helvetica, Sans-Serif;
line-height: 20px;
width: 500px;
padding:0px 0px 0px 30px;
margin:0px 0px;
}
.slide img {
position: absolute;
top: 20px;
left: 577px;
background:#fff;
padding:10px 10px;
}
#slider-stopper {
position: absolute;
font-family: Georgia, Helvetica, Sans-Serif;
top: 113px;
right: 55px;
color: #AC0000;
padding: 3px 8px;
font-size: 14px;
text-transform: uppercase;
z-index: 1000;
}
Adding Script CodeNow find (CTRL+F) this code in the template:
Step 2:And find the code
Step 3: Now add the following code just before the
tag.
And now click
Save Template Adding HTML CodeSo, let's see how to install this cool widget in your blog..
1. Sign into Blogger dashboard
old Blogger interface: Go to Dashboard - Design - Page Elements - Add a Gadget.If you're using the new Blogger interface: Go to Dashboard - Layout - Add a Gadget.Select 'HTML/Javascript' and add the one of code given below.Just copy and paste this code..
A collection of 26 Free eBooks which cover almost all the aspects of Blogging and help you to create better blogs. These eBooks which have been written by experts are very useful for bloggers.

This is the largest collection of RSS Icons in a post. Its a huge list containing more than 80 RSS Icon Sets.

This is a collection of 50 Beautiful Templates which have been converted from Wordpress to Blogger.

This is a simple copy paste method to remove the Blogger Navbar which is used in all the latest Blogger Templates

And now click
Save Now its time for you to put your favourite posts in the Posts Slider. If there are some alignment problems with the Post Title or Image or the Stop Button in the slider then dont worry, continue doing what I say. Search
in the blog template. Below it you will see
Post Description

If you are having problem with the placement of the Image, search
.slide img { in the template. The code will be as shown below
.slide img {
position: absolute;
top: 20px;
left: 577px;
background:#fff;
padding:10px 10px;
}
................................................................................................
................................................................................................
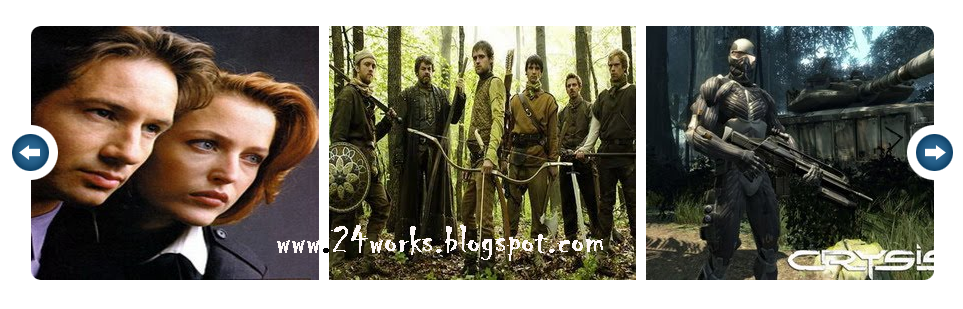
................................................................................................Simplest jQuery Featured Content Slider in Blogger / Blogspot BlogHow to Install This Widget on Blogger?
Steps...
A. Adding CSS Theme Code
B. Adding Script Code
C. Adding HTML Code
Adding CSS Theme CodeIn old layout: Go to Dashboard - Design - Edit HTML - Expand Widget Templates.
In new layout: Go to Dashboard - Template - Edit Template HTML - Expand Widget Templates.
Now find (CTRL+F) this code in the template:
]]>
And immediately
before it, paste this code:
#jFlowSlide{ background:#DBF3FD; font-family: Georgia; }
#myController { font-family: Georgia; padding:2px 0; width:610px; background:#3AB7FF; }
#myController span.jFlowSelected { background:#43A0D5;margin-right:0px; }
.slide-wrapper { padding: 5px; }
.slide-thumbnail { width:300px; float:left; }
.slide-thumbnail img {max-width:300px; }
.slide-details { width:290px; float:right; margin-left:10px;}
.slide-details h2 { font-size:1.5em; font-style: italic; font-weight:normal; line-height: 1; margin:0; }
.slide-details .description { margin-top:10px; }
.jFlowControl, .jFlowPrev, .jFlowNext { color:#FFF; cursor:pointer; padding-left:5px; padding-right:5px; padding-top:2px; padding-bottom:2px; }
.jFlowControl:hover, .jFlowPrev:hover, .jFlowNext:hover { background: #43A0D5; }
Adding Script CodeNow find (CTRL+F) this code in the template:
Step 2:And find the code
Step 3: Now add the following code just before the
tag.
And now click
Save Template Adding HTML CodeSo, let's see how to install this cool widget in your blog..
1. Sign into Blogger dashboard
old Blogger interface: Go to Dashboard - Design - Page Elements - Add a Gadget.If you're using the new Blogger interface: Go to Dashboard - Layout - Add a Gadget.Select 'HTML/Javascript' and add the one of code given below.Just copy and paste this code..
Top 5 Blog Search Engines Add Tweet Button with Tweets Counts in Blogger Posts Download BitDefender 2010 All products with one-click direct download links Personas for Firefox - Light weight Skins for Firefox Download Windows 7 Transformation Pack for XP and Vista Can my Computer run Windows 7? Ask Windows 7 Upgrade Advisor Do You Know Where Your Blog's Content Is Going? World's Fastest Way to Download Youtube Videos "Submit Blogger Blog's Sitemap to Top Search Engines Follow Simple Tips to Drive Traffic to your new Blog Get 1000's of Twitter followers in one button click Fastest way to Listen and Download Mp3 Songs Add Live Traffic Feed Widget to your Blogger Blog Fastest way of Social Sites Bookmarking How to Insert Adsense Ads inside Blogger Posts Download Google Chorme 4 Offline Installer UXTheme Multi-Patcher - Install Windows Themes/Visual Styles with a Double Click Increase Torrent Download Speed- The Easy Way! Increase Your Blog's Page Views Upto 300 Percent By Linkwithin
TEXT-OF-THE-SLIDE-20.
Read More »
Prev
1
2
3
4
5
6
7
8
9
10
11
12
13
14
15
16
17
18
19
Next
And now click
Save Customizations
Just replace “
IMAGE-TITLE“, “
TITLE-OF-THE-SLIDE“, “
TEXT-OF-THE-SLIDE” with your image, title and text respectively.
You can increase the number of slides according to your need and available space.
- If you increase the number of slides, then don’t forget to increase “jFlowControl” numbering.
lt;!-- Slide #1 Starts-->
IMAGE-LINK"/>
TITLE-OF-THE-SLIDE
TEXT-OF-THE-SLIDE

IMAGE-LINK"/>
TITLE-OF-THE-SLIDE
TEXT-OF-THE-SLIDE
IMAGE-LINK"/>
TITLE-OF-THE-SLIDE
TEXT-OF-THE-SLIDE
.
.
.
.
Prev
1
2
3
Next
................................................................................................
................................................................................................Moving jquery image slider for featured content in BloggerHow to Install This Widget on Blogger?
Steps...
A. Adding CSS Theme Code
B. Adding Script Code
C. Adding HTML Code
Adding CSS Theme CodeIn old layout: Go to Dashboard - Design - Edit HTML - Expand Widget Templates.
In new layout: Go to Dashboard - Template - Edit Template HTML - Expand Widget Templates.
Now find (CTRL+F) this code in the template:
]]>
And immediately
before it, paste this code:
#myslides{
background:#000 url(https://blogger.googleusercontent.com/img/b/R29vZ2xl/AVvXsEi-Ns4dhMmqOUOfeATFkzZvV7h-jpF6XkxBzbWBSX_CVy1G2Tyrt3zll_zQM8vH3DVcE8Og6UBX3LrybuKTz9apuSLuWi_73cUeoXtc2B4-LL681o9QZN-oNrtMjxEneSdqkCegyprV_g/s1600/mslid.jpg) repeat-x;
width: 650px;
height:165px;
margin-bottom:5px;
}
.stepcarousel{
position: relative; /*leave this value alone*/
overflow: scroll; /*leave this value alone*/
width: 554px; /*Width of Carousel Viewer itself*/
height: 160px; /*Height should enough to fit largest content's height*/
margin: 0px 48px 5px 48px;
}
.stepcarousel .belt{
position: absolute; /*leave this value alone*/
left: 0;
top: 0;
}
.stepcarousel .panel{
float: left; /*leave this value alone*/
overflow: hidden; /*clip content that go outside dimensions of holding panel DIV*/
margin: 20px 10px ; /*margin around each panel*/
width:170px; /*Width of each panel holding each content. If removed, widths should be individually defined on each content DIV then. */
background:#0e1829;
height:120px;
border:1px solid #1d2c44;
}
.stepcarousel .panel p{
text-align: left; /*leave this value alone*/
overflow: hidden; /*clip content that go outside dimensions of holding panel DIV*/
margin: 5px 5px ; /*margin around each panel*/
}
.stepcarousel .panel h2{
text-align: left; /*leave this value alone*/
height:20px;
overflow: hidden; /*clip content that go outside dimensions of holding panel DIV*/
margin: 2px 5px ; /*margin around each panel*/
font-size:16px;
font-weight:bold;
text-align:center;
font-family:Georgia,century gothic,Arial,verdana, sans-serif;
}
.stepcarousel .panel img{
float: left; /*leave this value alone*/
background:#0E1829; /*clip content that go outside dimensions of holding panel DIV*/
margin: 5px 5px 5px 5px; /*margin around each panel*/
padding:0px 0px;
}
Adding Script CodeNow find (CTRL+F) this code in the template:
Step 2:And find the code
Step 3: Now add the following code just before the
tag.
And now click
Save Template Adding HTML CodeSo, let's see how to install this cool widget in your blog..
1. Sign into Blogger dashboard
old Blogger interface: Go to Dashboard - Design - Page Elements - Add a Gadget.If you're using the new Blogger interface: Go to Dashboard - Layout - Add a Gadget.Select 'HTML/Javascript' and add the one of code given below.Just copy and paste this code..
And now click
Save ................................................................................................
................................................................................................
................................................................................................Make A Simple Featured Content SlideShow Using JQueryHow to Install This Widget on Blogger?
Steps...
A. Adding CSS Theme Code
B. Adding Script Code
C. Adding HTML Code
Adding CSS Theme CodeIn old layout: Go to Dashboard - Design - Edit HTML - Expand Widget Templates.
In new layout: Go to Dashboard - Template - Edit Template HTML - Expand Widget Templates.
Now find (CTRL+F) this code in the template:
]]>
And immediately
before it, paste this code:
#contentSlide {
background : #ddd; -moz-border-radius-topleft:5px;
-moz-border-radius-topright:5px;
-moz-border-radius-bottomleft:5px;
-moz-border-radius-bottomright:5px;
-webkit-border-top-left-radius:5px;
-webkit-border-top-right-radius:5px;
-webkit-border-bottom-left-radius:5px;
-webkit-border-bottom-right-radius:5px;
height : 228px; margin-bottom: 10px;
padding : 10px 0px 10px;
}
#slideshow {
margin : 0 auto;
width : 953px;
height : 230px;
background : #eeeeee none repeat scroll 0 0;
position : relative;
}
#slideshow #slidesContainer {
margin : 0 auto;
width : 845px;
height : 228px;
overflow : auto;
position : relative;
}
#slideshow #slidesContainer .slide {
margin : 0 auto;
width : 845px;
height : 228px;
}
.control {
display : block;
width : 39px;
height : 228px;
text-indent : -10000px;
position : absolute;
cursor : pointer;
}
#leftControl {
top : 0;
left : 0;
width : 55px;
background : transparent url(http://lh6.ggpht.com/_9b1traaMESE/Sms_Pg_IsqI/AAAAAAAAAXU/tTxdiIsFY4g/previous%20gray.jpg)no-repeat scroll 0 0;
}
#rightControl {
top : 0;
right : 0;
background : transparent url(http://lh6.ggpht.com/_9b1traaMESE/Sms-s5qb9iI/AAAAAAAAAXQ/edpXAZIaxCI/next%20gray.jpg) no-repeat scroll 0 0;
width : 55px;
}
.slide h2, .slide p {
margin : 15px;
}
.slide h2 {
font : italic 24px Georgia, "Times New Roman", Times, serif;
color : #212421;
letter-spacing : -1px;
}
.slide img {
float : right;
margin : 0 15px;
padding : 1px;
}
Adding Script CodeNow find (CTRL+F) this code in the template:
Step 2:And find the code
Step 3: Now add the following code just before the
tag.
And now click
Save Template Adding HTML CodeSo, let's see how to install this cool widget in your blog..
1. Sign into Blogger dashboard
old Blogger interface: Go to Dashboard - Design - Page Elements - Add a Gadget.If you're using the new Blogger interface: Go to Dashboard - Layout - Add a Gadget.Select 'HTML/Javascript' and add the one of code given below.Just copy and paste this code..
SlideShow Featured Content Using JQuery
Featured Content Slider Using JQuery!
 TEXT-OF-THE-SLIDE-1.
Read More »
Thumbnail With Caption Using Simple JQuery
TEXT-OF-THE-SLIDE-1.
Read More »
Multi Level Drop-Down Menu Dengan CSS dan JQuery!
TEXT-OF-THE-SLIDE-1.
Read More »
Super Sexy Bookmarks Widget for Blogger !
TEXT-OF-THE-SLIDE-1.
Read More »
And now click
Save Note: Please edit the title of the content buddy, description and link content.
................................................................................................
................................................................................................
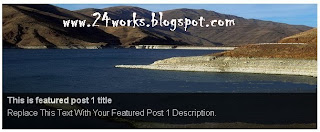
................................................................................................New And Stylish JQuery Featured Post Widget for Blogger BlogsHow to Install This Widget on Blogger?
Steps...
A. Adding CSS Theme Code
B. Adding Script Code
C. Adding HTML Code
Adding CSS Theme CodeIn old layout: Go to Dashboard - Design - Edit HTML - Expand Widget Templates.
In new layout: Go to Dashboard - Template - Edit Template HTML - Expand Widget Templates.
Now find (CTRL+F) this code in the template:
]]>
And immediately
before it, paste this code:
#featured{
width:400px;
padding-right:250px;
position:relative;
height:250px;
background:#fff;
border:5px solid #ccc;
}
#featured ul.ui-tabs-nav{
position:absolute;
top:0; left:400px;
list-style:none;
padding:0; margin:0;
width:250px;
}
#featured ul.ui-tabs-nav li{
padding:1px 0; padding-left:13px;
font-size:12px;
color:#666;
}
#featured ul.ui-tabs-nav li span{
font-size:11px; font-family:Verdana;
line-height:18px;
}
#featured .ui-tabs-panel{
width:400px; height:250px;
background:#999; position:relative;
overflow:hidden;
}
#featured .ui-tabs-hide{
display:none;
}
#featured li.ui-tabs-nav-item a{/*On Hover Style*/
display:block;
height:60px;
color:#333; background:#fff;
line-height:20px;
outline:none;
}
#featured li.ui-tabs-nav-item a:hover{
background:#f2f2f2;
}
#featured li.ui-tabs-selected{ /*Selected tab style*/
background:url('https://blogger.googleusercontent.com/img/b/R29vZ2xl/AVvXsEjQ6j2dy7TZB922mP5FEKgKfBFCBeDlB8XaoTlaRH6TjaeBxcKk7PL3StnvzHBGFdmjJ8iK5RIqp7xi-co7MeapBZ_wP7Vf7IsYKNqdBXN3LIFqwMMzm3ZPLDArd_KN36BfwiqixIKKXCs/s320/selected-item.gif') top left no-repeat;
}
#featured ul.ui-tabs-nav li.ui-tabs-selected a{
background:#ccc;
}
#featured ul.ui-tabs-nav li img{
float:left; margin:2px 5px;
background:#fff;
padding:2px;
border:1px solid #eee;
}
#featured .ui-tabs-panel .info{
position:absolute;
top:180px; left:0;
height:70px; width: 400px;
background: url('http://i47.tinypic.com/117s1g9.jpg') ;
}
#featured .info h2{
font-size:14px; font-family:Georgia, serif;
color:#fff; padding:5px; margin:0;
overflow:hidden;
}
#featured .info p{
margin:0 5px;
font-family:Verdana; font-size:11px;
line-height:15px; color:#f0f0f0;
}
#featured .info a{
text-decoration:none;
color:#fff;
}
#featured .info a:hover{
text-decoration:underline;
}
Adding Script CodeNow find (CTRL+F) this code in the template:
Step 2:And find the code
Step 3: Now add the following code just before the
tag.
And now click
Save Template Adding HTML CodeSo, let's see how to install this cool widget in your blog..
1. Sign into Blogger dashboard
old Blogger interface: Go to Dashboard - Design - Page Elements - Add a Gadget.If you're using the new Blogger interface: Go to Dashboard - Layout - Add a Gadget.Select 'HTML/Javascript' and add the one of code given below.Just copy and paste this code..

Lorem ipsum dolor sit amet, to cancel reply. Used Cars. ....read more

Vestibulum leo quam, accumsan nec porttitor a, euismod ac tortor. Sed ipsum lorem, sagittis...read more

liquam erat volutpat. Proin id volutpat nisi. Nulla facilisi. Curabitur facilisis sollicitudin ornare....read more

Quisque sed orci ut lacus viverra interdum ornare sed est. Donec porta, erat eu pretium luctus ....read more
And now click
Save Note: Please edit the above code by replacing the title, description and link content
................................................................................................
................................................................................................
................................................................................................Awesome Automatic Content Slider for Blogger using jQueryHow to Install This Widget on Blogger?
Steps...
A. Adding CSS Theme Code
B. Adding Script Code
C. Adding HTML Code
Adding CSS Theme CodeIn old layout: Go to Dashboard - Design - Edit HTML - Expand Widget Templates.
In new layout: Go to Dashboard - Template - Edit Template HTML - Expand Widget Templates.
Now find (CTRL+F) this code in the template:
]]>
And immediately
before it, paste this code:
/* START
--------------------------------------------------------------------
Awesome Automatic Content Sliders for Blogger using jQuery
http://css-tricks.com/889-creating-a-slick-auto-playing-featured-content-slider/
--------------------------------------------------------------------
Featured Content Slider
*/
#slider-wrap { width: 500px; margin: 25px auto; position: relative; min-height: 500px;font-size: 10px; background: url(http://i1133.photobucket.com/albums/m596/abu-farhan/featuredcontentslider-bg.png) top center; }
.slider-wrap{ font-family: Arial, Helvetica, sans-serif; width: 419px; position: absolute; top: 87px; left: 40px; }
.stripViewer .panelContainer
.panel ul{ text-align: left; margin: 0 15px 0 30px; }
.stripViewer{ position: relative; overflow: hidden; width: 419px; height: 285px; }
.stripViewer .panelContainer{ position: relative; left: 0; top: 0; }
.stripViewer .panelContainer .panel { float: left; height: 100%; position: relative; width: 419px; }
.stripNavL, .stripNavR, .stripNav{ display: none; }
.nav-thumb { border: 1px solid black; margin-right: 5px; }
#movers-row { margin: -46px 0 0 62px; }
#movers-row div { width: 20%; float: left; }
#movers-row div a.cross-link { float: right; }
.photo-meta-data{ background: url(http://i1133.photobucket.com/albums/m596/abu-farhan/featuredcontentslider-transpBlack.png); padding: 10px; height: 40px; margin-top: -50px; position: relative; z-index: 9999; color: white; }
.photo-meta-data span { font-size: 13px; }
.cross-link { display: block; width: 62px; margin-top: -10px; position: relative; padding-top: 10px; z-index: 9999; }
.active-thumb { background: transparent url(http://i1133.photobucket.com/albums/m596/abu-farhan/featuredcontentslider-icon-uparrowsmallwhite.png) top center no-repeat; }
/* END
--------------------------------------------------------------------
Awesome Automatic Content Sliders for Blogger using jQuery
--------------------------------------------------------------------
Featured Content Slider
*/
Adding Script CodeNow find (CTRL+F) this code in the template:
Step 2:And find the code
Step 3: Now add the following code just before the
tag.
And now click
Save Template Adding HTML CodeSo, let's see how to install this cool widget in your blog..
1. Sign into Blogger dashboard
old Blogger interface: Go to Dashboard - Design - Page Elements - Add a Gadget.If you're using the new Blogger interface: Go to Dashboard - Layout - Add a Gadget.Select 'HTML/Javascript' and add the one of code given below.Just copy and paste this code..
And now click
Save credit by
abu-farhan................................................................................................
................................................................................................
................................................................................................Using jQuery Slider Featured Posts (glory)How to Install This Widget on Blogger?
Steps...
A. Adding CSS Theme Code
B. Adding Script Code
C. Adding HTML Code
Adding CSS Theme CodeIn old layout: Go to Dashboard - Design - Edit HTML - Expand Widget Templates.
In new layout: Go to Dashboard - Template - Edit Template HTML - Expand Widget Templates.
Now find (CTRL+F) this code in the template:
]]>
And immediately
before it, paste this code:
/* featured fade */
#wrapper-featured{
padding:10px 0 ;
width:650px;
height: 326px;
margin:0 ;
background: url(https://blogger.googleusercontent.com/img/b/R29vZ2xl/AVvXsEghUPU9V7fcUqLhS0vq1Rzt9W-2Y7dUJxpLTcF5fJXftKXdKfB0pOBJWU5aMXsuuZxVrtFZRM_7gUpgcGRuAN_mTuS2VUtdJOTdLZ9AnACOV5P9pxQxn-NdWIM5qaLZXiy1ZwHQTw9GImAT/s1600/bg_featured.jpg) no-repeat;
position:relative;
}
#wrapper-myslides {
width:550px;
height:210px;
padding: 0 0 ;
margin: 3px 0 0 10px;
position:relative;
float:left;
}
#myslides {
width:550px;
height:210px;
padding: 0 0 50px;
margin: 0 18px ;
overflow:hidden;
}
.panel{
width:550px;
height:210px;
}
#myslides img.crop-foto {
margin:8px 10px 10px 9px;
border:1px solid #fff;
display:block;
position:absolute;
right:3px;
top:0;
}
.featured-entry {
text-align:left;
line-height:1.5em;
font-style:italic;
font-size:12px;
font-family: georgia,Arial,Verdana, Helvetica, sans-serif;
padding: 20px 10px 0;
width:280px;
color:#fff;
position:absolute;
top:0;
left:0;
}
h3.featured-title {
font-size:22px;
text-align:left;
font-family:Georgia, Arial,Verdana, Helvetica, sans-serif;
margin:10px 0 5px;
padding:0 0 5px;
font-weight:normal;
line-height:1em;
font-style:normal;
}
h3.featured-title a:link, h3.featured-title a:visited{
color:#fff;
}
h3.featured-title a:hover {
color:#b1e1ff;
}
#nav-slides a#prev {
position:absolute;
bottom:105px;
left:135px;
z-index:1;
color:#800;
width:14px;
height:15px;
background: url(https://blogger.googleusercontent.com/img/b/R29vZ2xl/AVvXsEjy8C7FkWmHXo70T5R-TsPETk-JpXvEfAK_ITurdI5DTybUqOZnlP6w4ZAyHMTb1J9eQQnD3esYtaT6dP36eZo78XGLotWIotxjirX6ZDuiWynMA9A0ld7GK7VUJ_-eiEKPwDSAylHvc4qV/s400/prev.jpg) no-repeat;
}
#nav-slides a#prev:hover{
background: url(https://blogger.googleusercontent.com/img/b/R29vZ2xl/AVvXsEiZzOrU7vXwRRzGLkANsk4DZgNcvIRhbpfnsLJo0czraXrL_TPH9cB3IcO7JW-aRLHWBgQvo0BpwVrUW5LoFist9Qzbpn8H4CX2OQypfefdN46Ld5CLzbCT2vIeHRkc2QJJmaVJBWhEwZAJ/s400/prev_hover.jpg) no-repeat;
}
#nav-slides a#next {
position:absolute;
bottom:105px;
left:160px;
z-index:1;
color:#800;
width:14px;
height:15px;
background: url(https://blogger.googleusercontent.com/img/b/R29vZ2xl/AVvXsEhSB4zzZ1IEW_2YtOIDNn-gUnifDaKhAWyh6tJy1h0rpMaAHLiEtdMVaGNd1B1mDZrarWqJqZwE4LdXrkZpwaysZacHyPTdGrf7ne7idHOUTQzNXcIWBx_TmfQfhYzzgKP1hjYrGreUk_1x/s400/next.jpg) no-repeat;
}
#nav-slides a#next:hover{
background: url(https://blogger.googleusercontent.com/img/b/R29vZ2xl/AVvXsEgKSMsq_tzAQnQSpzHuc6HNEtUd_YVZfK5jTuKJ1BQtGBt6V2LLD-OcMSpu4hg8TSjcOQnwgXKbIR42I2bm9vw9A9wLViEXF0SjWEEp3VcviNbZH1rJSfYn-LlR10YqfFdgFlmn9lCiHHMK/s400/next_hover.jpg) no-repeat;
}
Adding Script CodeNow find (CTRL+F) this code in the template:
Step 2:And find the code
Step 3: Now add the following code just before the
tag.
And now click
Save Template Adding HTML CodeSo, let's see how to install this cool widget in your blog..
1. Sign into Blogger dashboard
old Blogger interface: Go to Dashboard - Design - Page Elements - Add a Gadget.If you're using the new Blogger interface: Go to Dashboard - Layout - Add a Gadget.Select 'HTML/Javascript' and add the one of code given below.Just copy and paste this code..
Makna ‘Cinta Sejati’ terus dicari dan digali. Manusia dari zaman ke zaman seakan tidak pernah bosan membicarakannya. Sebenarnya? apa itu ‘Cinta Sejati’ dan bagaimana pandangan Islam terhadapnya?...
Ia adalah wanita yang terus hidup dalam hati suaminya sampaipun ia telah meninggal dunia. Tahun-tahun yang terus berganti tidak dapat mengikis kecintaan sang suami padanya. Panjangnya masa tidak dapat menghapus kenangan bersamanya di hati sang suami
Cinta sejati...Adalah satu janji...
Yang dibuat oleh hati...Tak dapat ditulis...Tak dapat dibaca...Namun takkan terpisah oleh jarak...Takkan berubah oleh waktu...Sedetik di mata...
Selamanya di jiwa...Abadi tuk selamanya...Do'a di malam hari adalah penawar kerinduannya...Dan Allah adalah tujuannya...
And now click
Save Note: Please use the text in red with the post title, a brief description of the post and replace the url of the image or thumbnails slider menu above
Done, do not forget to save / save templates and see the results.
WRITE YOUR POST DESCRIPTION HERE
WRITE YOUR POST DESCRIPTION HERE
WRITE YOUR POST DESCRIPTION HERE
................................................................................................
................................................................................................Create Featured Posts (Menu Slider) With JQueryHow to Install This Widget on Blogger?
Steps...
A. Adding CSS Theme Code
B. Adding Script Code
C. Adding HTML Code
Adding CSS Theme CodeIn old layout: Go to Dashboard - Design - Edit HTML - Expand Widget Templates.
In new layout: Go to Dashboard - Template - Edit Template HTML - Expand Widget Templates.
Now find (CTRL+F) this code in the template:
]]>
And immediately
before it, paste this code:
/* Features */
#featured {height: 290px; overflow: hidden; background: url('http://sites.google.com/site/amatullah83/background/slide0002_background.gif') no-repeat top center; clear: both; font-size: 0.85em; margin-bottom: 5px;}
#featured .post {padding: 20px;}
#featured .post .featured-thumb {background: url('https://blogger.googleusercontent.com/img/b/R29vZ2xl/AVvXsEjb9MqPF3UZcX4BNT66FgqltIpT-t6K79qRSmP03CqPyPoSXvvHKMoTFpvAnlLofVcze8pT9-JzDPf19f91u-Q5vJ5x2RBQMIxvTwHW85A_GBEVXFYXrx4e1HOMfMmLu5QOvhrOfWJMdG0/s400/nothumb.gif') no-repeat center; float: left; border: 5px solid #FFFF99; overflow: hidden; height: 120px; width: 200px; margin-right: 15px;}
#featured .post .featured-thumb img {width: 200px;}
#featured .post .featured-text {padding-bottom: 10px;}
#featured .post .featured-title {font: normal 1.1em Georgia, Times, Serif; line-height: 1.1em;}
#featured .post .featured-comment {background: url('https://blogger.googleusercontent.com/img/b/R29vZ2xl/AVvXsEjTS_9aUejmvOG-y4QcAGtIYq-dt4WyEEb0RgmdXQRAxKO8sVJj9RL3hw9LVwLe00jgkQogzBkpev4CqcwpTPImGZx0SBFO3Vcx5KmunEhEzBheahFeyHRTI215QzVG3s8UcXulzs7Tt8M/s400/entry-comment.png') no-repeat left center; padding: 5px 0px 5px 20px;margin-right: 20px;}
#featured .post .featured-date {background: url('https://blogger.googleusercontent.com/img/b/R29vZ2xl/AVvXsEiuo0L7qDCONMqxHFyyNrFFTczQpqD5OWaJaGj2CDdKwyfAdCE9FCxYmDxIawczgiVL82DS3PCgc3lfdrESzojqaoFO2oG5PnuzN8spKb5GEsSKkgShbI-p6gnUd1cPYrXoVY2Ge3jtavQ/s400/entry-date.gif') no-repeat left center; padding: 5px 0px 5px 20px;margin-right: 20px;}
#featured .post .featured-meta {color: #999; clear: both; padding: 10px 0px; overflow: hidden; font-size: 0.9em;}
#featured .post .featured-read {display: block; float: right; background: #A9F5F2; width: 80px; color: #fff !important; padding: 5px 0px; text-align: center;-moz-border-radius-topleft:5px;-moz-border-radius-topright:5px;-moz-border-radius-bottomleft:5px;-moz-border-radius-bottomright:5px;-webkit-border-bottom-left-radius:5px;-webkit-border-bottom-right-radius:5px;-webkit-border-top-left-radius:5px;-webkit-border-top-right-radius:5px;}
Adding Script CodeNow find (CTRL+F) this code in the template:
Step 2:And find the code
Step 3: Now add the following code just before the
tag.
And now click
Save Template Adding HTML CodeSo, let's see how to install this cool widget in your blog..
1. Sign into Blogger dashboard
old Blogger interface: Go to Dashboard - Design - Page Elements - Add a Gadget.If you're using the new Blogger interface: Go to Dashboard - Layout - Add a Gadget.Select 'HTML/Javascript' and add the one of code given below.Just copy and paste this code..
If you aren’t using twitter as a way of generating free traffic to your website, you’re missing out on one of the easiest marketing strategies ever to hit the Internet.
With so many social communities online, it is easy to see why Internet Marketers with limited time have been drawn to the simplistic interface and speediness...
Online marketing may have developed a sudden surge these past few years, but many in the know how have felt its rise even from way then. As more internet based businesses are put up, the need to develop new marketing skills and knowledge based on this new medium have arisen. More and more marketing strategies...
Today.com is a free blogging platform that works like Blogger and Wordpress, except that you will be paid for blogging at Today.com. Payment will be made on the 10th of each month via Paypal or check with $50 minimum payment.
How to Earn Money with Today.com
1. $2.00 per 1000 unique visitors for the first 30 days.
2....
Gauher Chaudhry, the man behind Pay Per Click Formula, has just released an 89 page insider’s guide to CPA marketing profts for FREE!
That’s right, FREE as in cost you zero cents to get the most comprehensive guides on CPA marketing and learn the way to earn as much as $100,000 per day with CPA...
Lorem ipsum dolor sit amet, consectetuer adipiscing elit. Nullam nec lorem. Duis erat. Mauris faucibus, nibh sed scelerisque commodo, libero lacus posuere diam, at ornare felis quam vitae mauris. Nam in diam. Cras nec metus. Nam suscipit elementum eros. Mauris ut nibh. Maecenas id velit. Nulla pellentesque porttitor dui.
Lorem ipsum dolor sit amet, consectetuer adipiscing...